DaoAI World Deployment and Usage Guide
This guide will help you connect the power and network to the server upon receipt, and access the DaoAI World application from both the local browser and other devices on the same LAN by checking the local IP address.
There are 5 steps to deploying the DaoAI World server:
1. Server Preparation
1.1 Check Accessories
Confirm the following accessories are included: - Server main unit - Power cable - Network cable - Relevant manuals
Ensure the server is intact and undamaged.
1.2 Connect Power and Network
Plug the power cable into the server's power port and connect it to a power outlet.
Use a network cable to connect the server's Ethernet port to the LAN switch or router. Make sure the Ethernet port light is on.
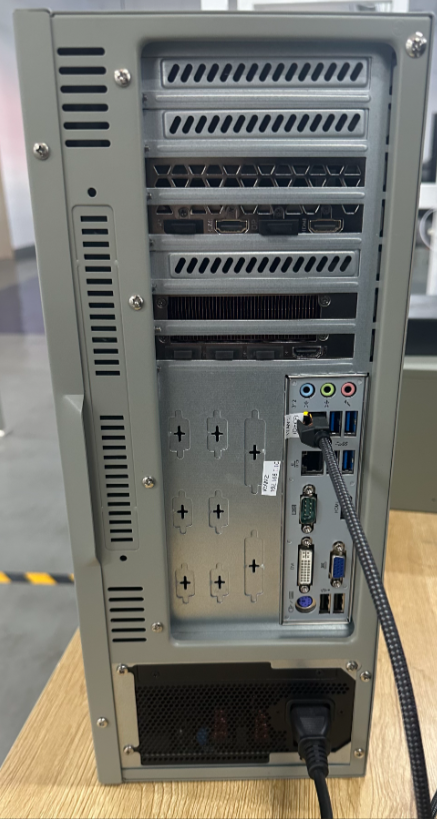
Figure: Server appearance and power/network connection diagram
备注
A blinking Ethernet light indicates a working network connection.
1.3 Other Preparations
Ensure the LAN switch or router is functioning properly.
If remote support is needed, record the server's serial number and contact Welinkirt technical support.
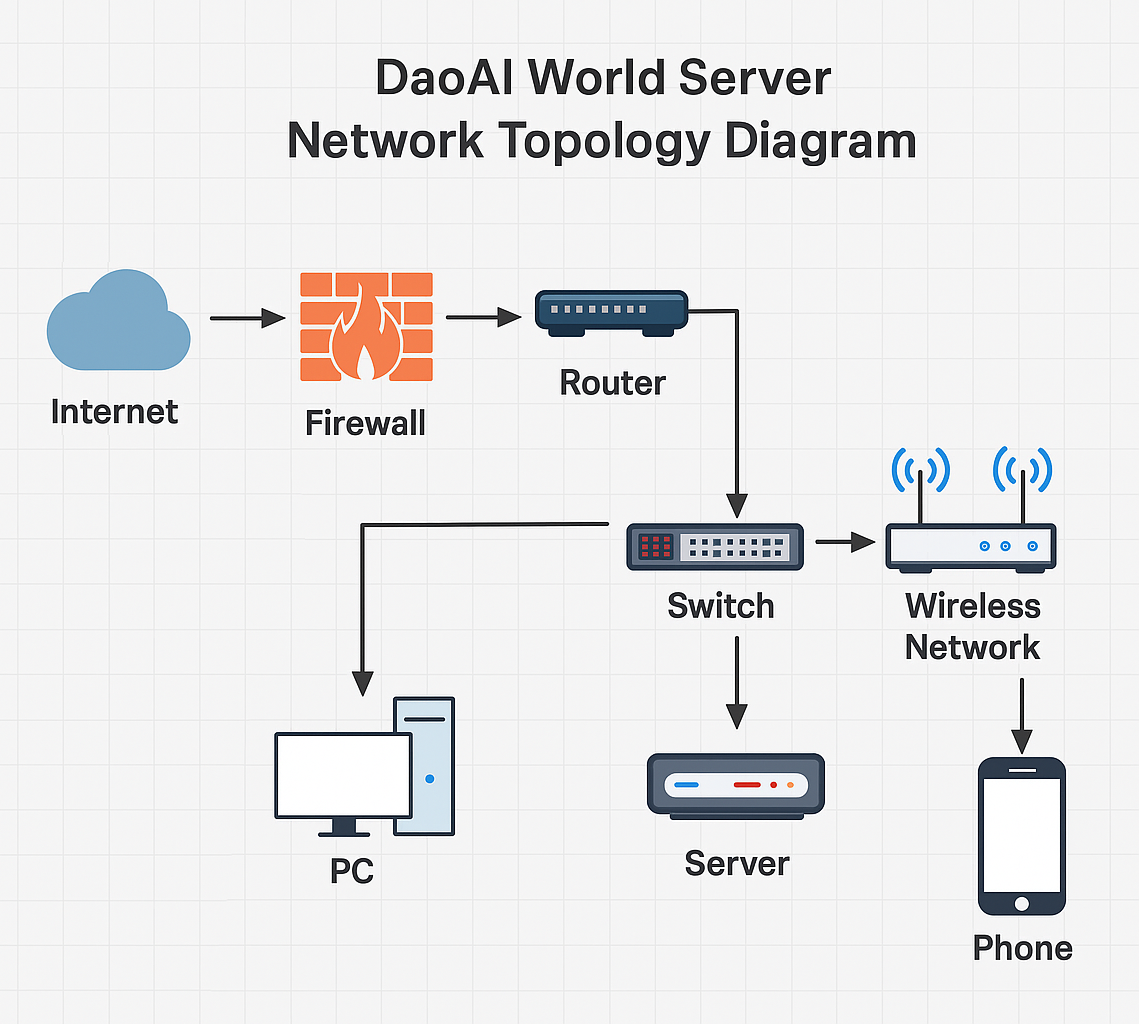
Figure: LAN topology and connection diagram
2. Power On and Login to the OS
2.1 Power On
Press the power button on the server to start it.
2.2 Log in to Ubuntu Desktop
If a monitor and keyboard are connected to the server: enter admin account credentials to log in. Default username: dwuser Default password: dwuser
If no monitor is connected, you can access the server via SSH (requires knowing the server's IP address on the LAN).

Figure: Ubuntu login interface
3. Check Local IP Address
3.1 Method 1: Use Ubuntu Terminal
Press Ctrl + Alt + T to open the terminal.
Enter the following command: ifconfig
Find the IP address under the eno1 network interface, e.g.: inet 192.168.10.61/24
This IP address will be used to access DaoAI World in the next step.
3.2 Method 2: Check via LAN Router
Log into your LAN router management interface to find the IP address assigned to the server.
For example, enter 192.168.1.1 in your browser to access the router admin page.
In the DHCP client list, find the device named welinkirt and check its IP address.

Figure: Router management interface
4. Access from Other Devices in LAN
4.1 Ensure Devices Are on the Same Network
Make sure your computer, mobile phone, and other devices are connected to the same LAN as the DaoAI World server.
4.2 Access DaoAI World via Browser
On a device connected to the LAN, open a browser and enter the server's IP address, e.g., http://192.168.10.61
If successful, you will see the DaoAI World login page.
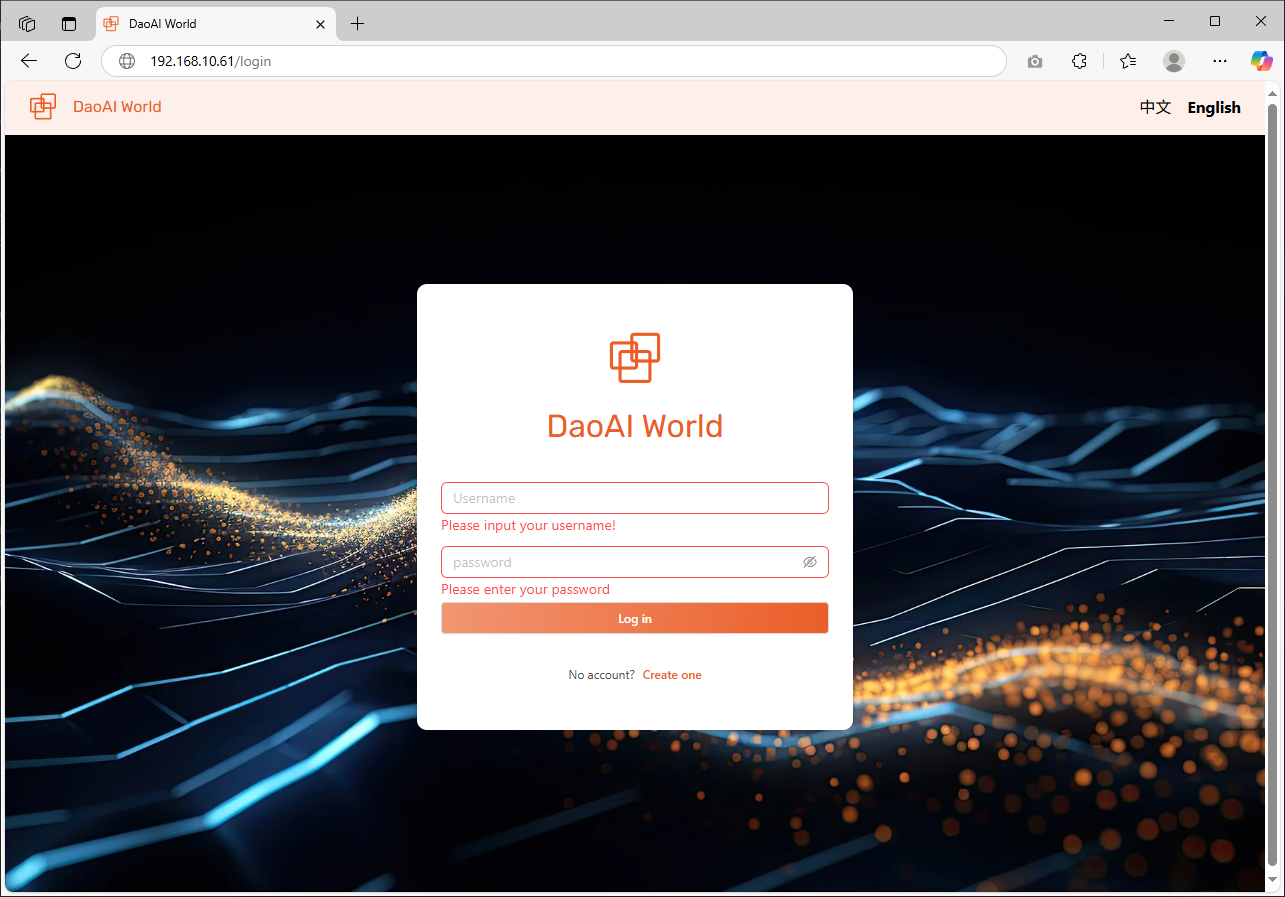
Figure: DaoAI World login page
4.3 Log In and Use DaoAI World
- Use the default DaoAI World credentials to log in:
Default username: dwuser
Default password: dwuser123
After logging in, you can perform operations such as training workflows, data management, and model management.
5. Access via Local Ubuntu Desktop Browser
5.1 Open Browser
On the Ubuntu desktop, click the application menu in the bottom left corner and open a browser (e.g., Chrome).
5.2 Enter Server Address
In the browser’s address bar, type: 127.0.0.1 You will be taken to the DaoAI World login page.
6. Troubleshooting
6.1 Login Page Loads, but Login Fails
If login appears unresponsive, follow the steps below for troubleshooting:
Press F12 on the browser page to open Developer Tools
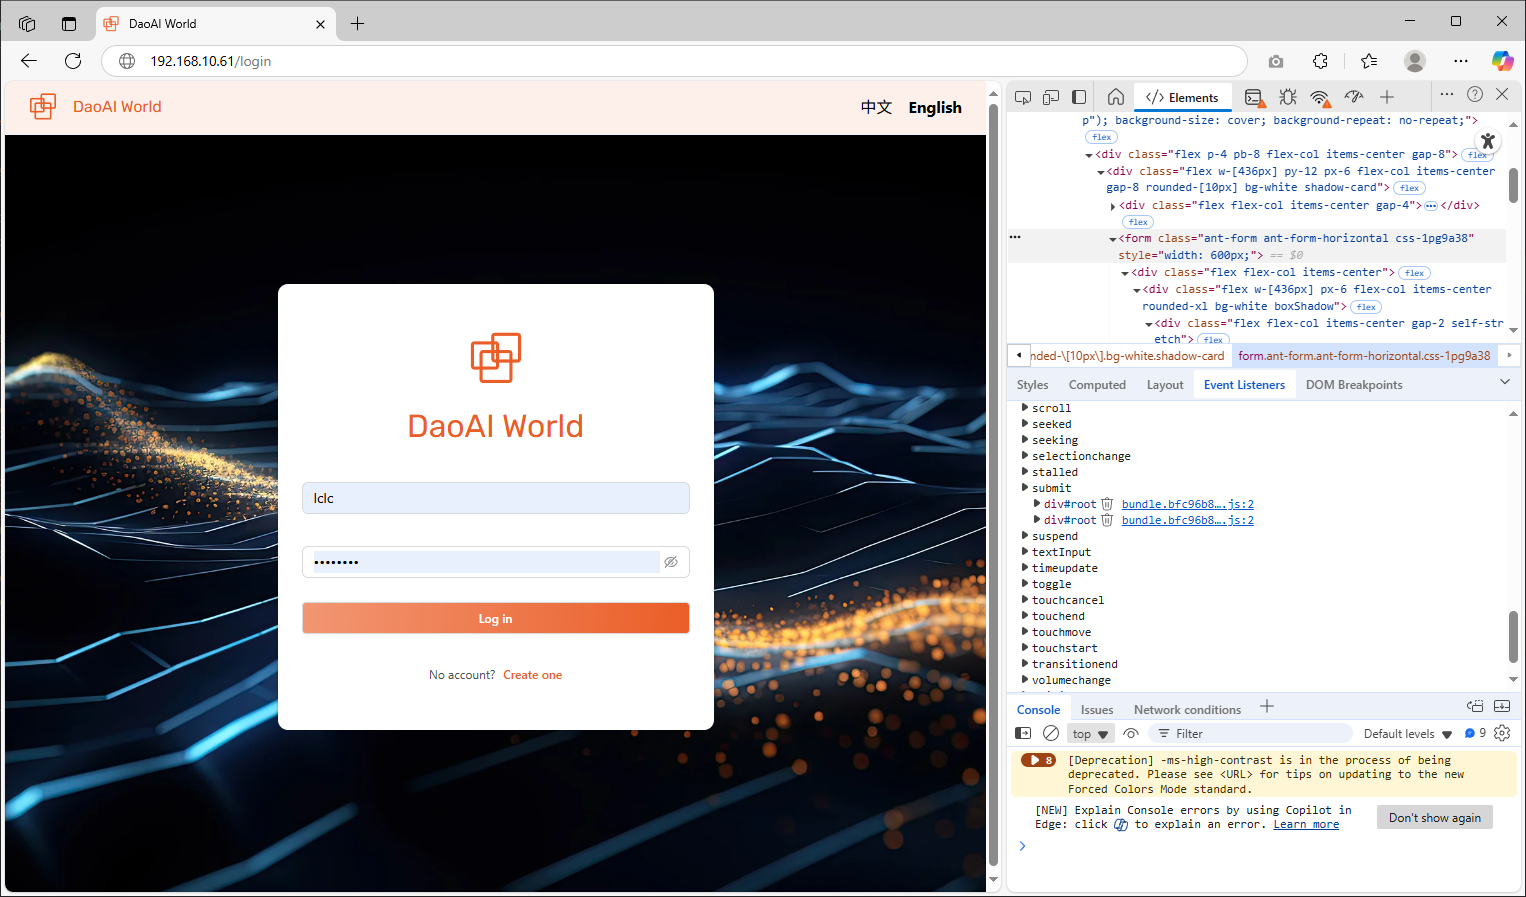
Figure: Press F12 to open developer tools.
Open the "Network" tab and find the request labeled "Login"
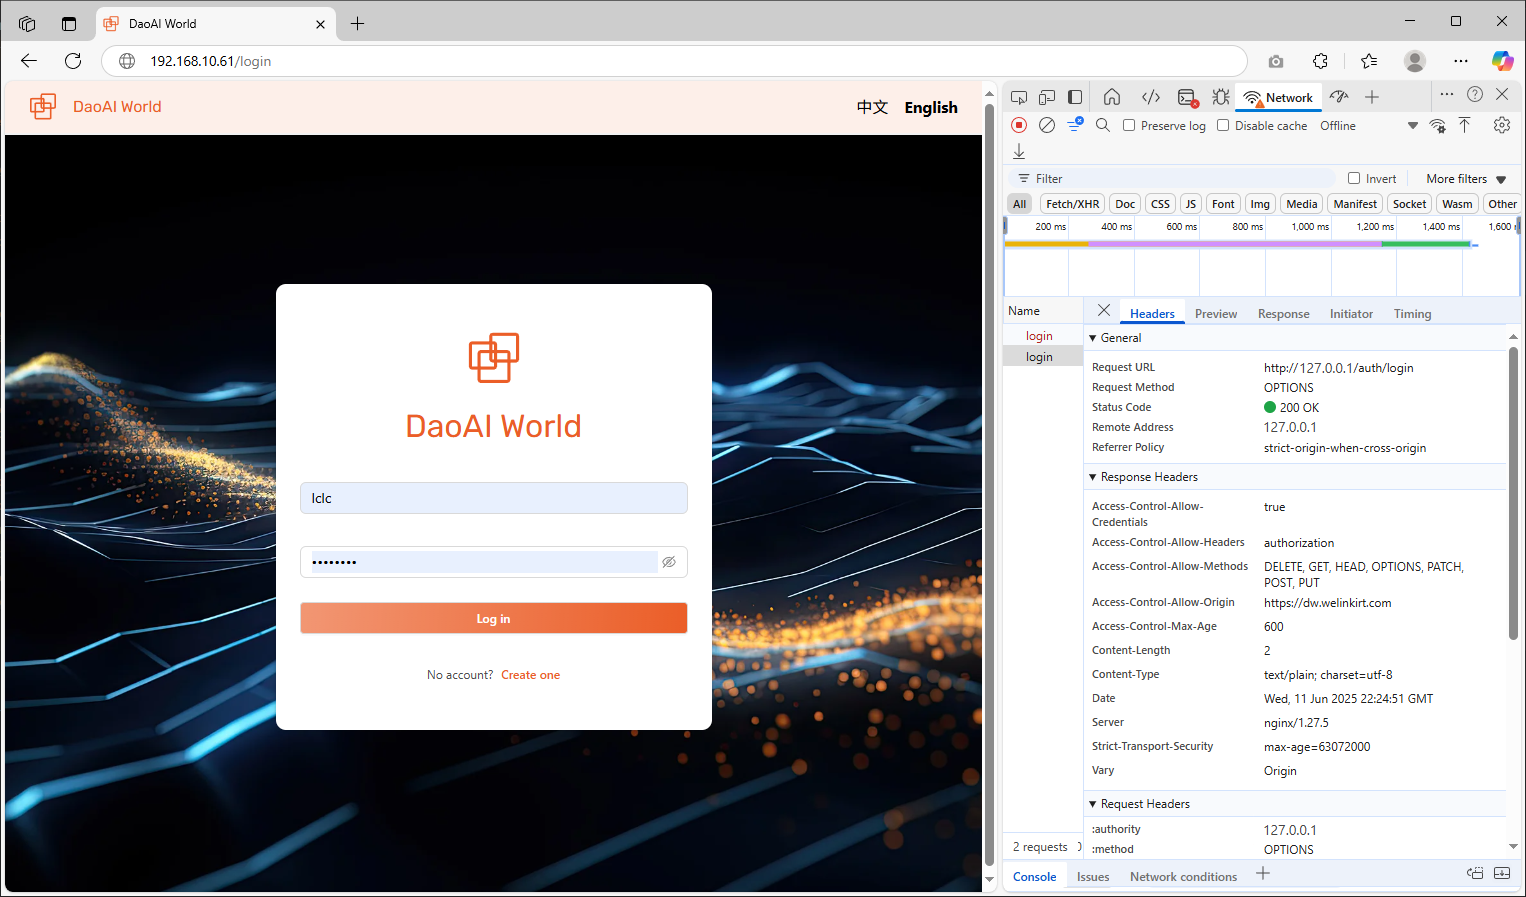
Figure: Information about the "Login" request in the Network tab.
Check the request details and confirm whether the IP address is correct
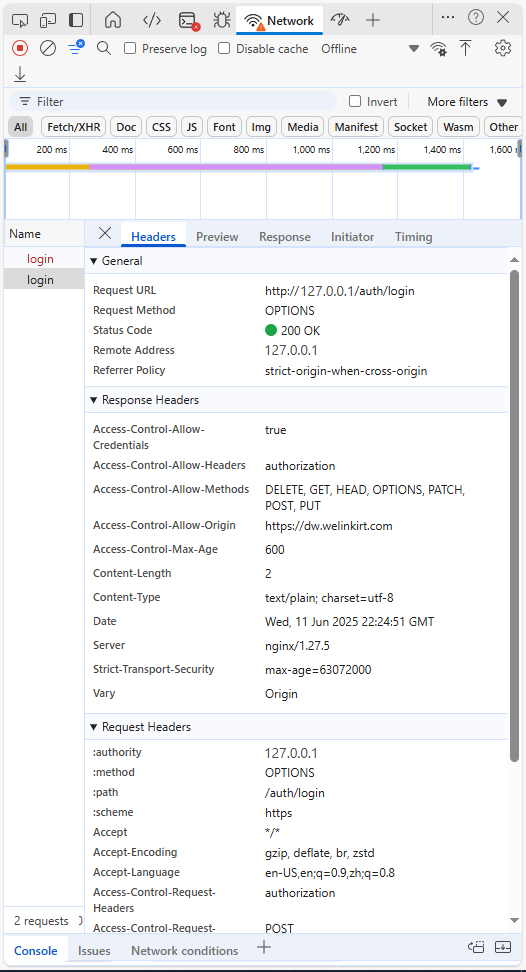
Figure: Detailed information of the login request. The request URL should match the LAN IP address shown in your browser.
- Note:
Make sure the login request URL matches your current LAN access address.
If the IP address appears as 172.xxx.xxx.xxx, possible causes include:
Network issue: Your device is not in the same LAN as the DW server.
Server not started: The server may be powered off.
Service not running: The backend service of the DW platform did not start properly. Contact technical support.
- Solutions:
Try restarting the DW offline server. The backend address will update automatically.
In the F12 "Network" tab, select "Disable cache" and refresh the page, then try logging in again.
Double-check your network connectivity. If problems persist, contact technical support.
6.2 How to Set a Static IP for My Server?
If you need to assign a static IP address to your server for long-term use, you can configure a static IP reservation in your router settings.