Quick Start
DaoAI World is designed to seamlessly interpret images into valuable information, offering a comprehensive suite of computer vision tools.
From data annotation to model training and deployment,
our platform provides an end-to-end solution that enables you to accomplish your goals efficiently.
Whether you're new to machine learning or an experienced professional,
DaoAI World makes it easy to get started, ensuring you can quickly master the platform.
In this guide, we will train a keypoint detection model to identify the outer contour of door handles, their orientation (front or back), and corresponding keypoints.
This tutorial will help you quickly get started with DaoAI World, and the knowledge gained from this project can also be applied to other tasks.
Select Language
After opening the DaoAI World homepage, you can select your preferred language from the top-right corner, with options available in both Chinese and English.

Login/Register
DaoAI World includes a user management feature, where each user has their own independent workspace.
This ensures data security and prevents project mix-ups.
If you don’t have a DaoAI World account yet, you can click the "Create one" option to create a new one.
If you already have an account, simply select "Login" to access your workspace.
Create a Project
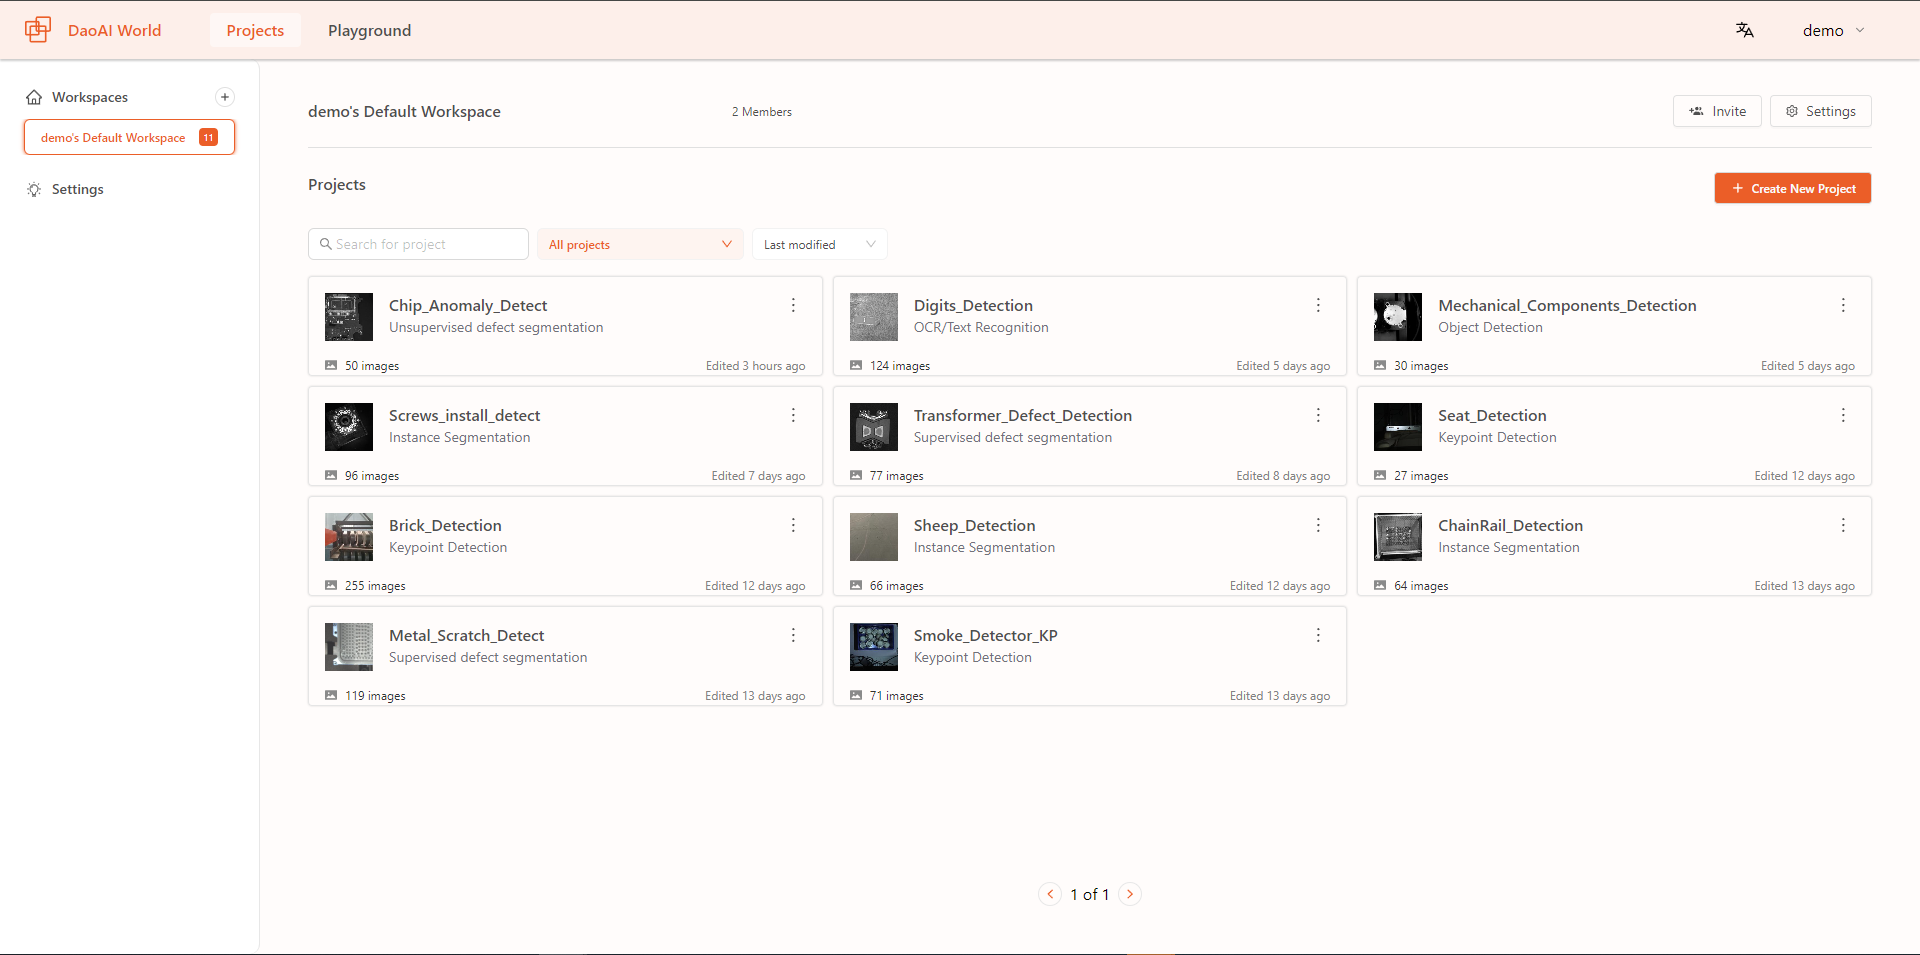
After logging into your account, you will see the project management page.
You can create a new task by setting up a new project. Each project operates independently, and you can rename each project as needed.
Now, let's create our first project.
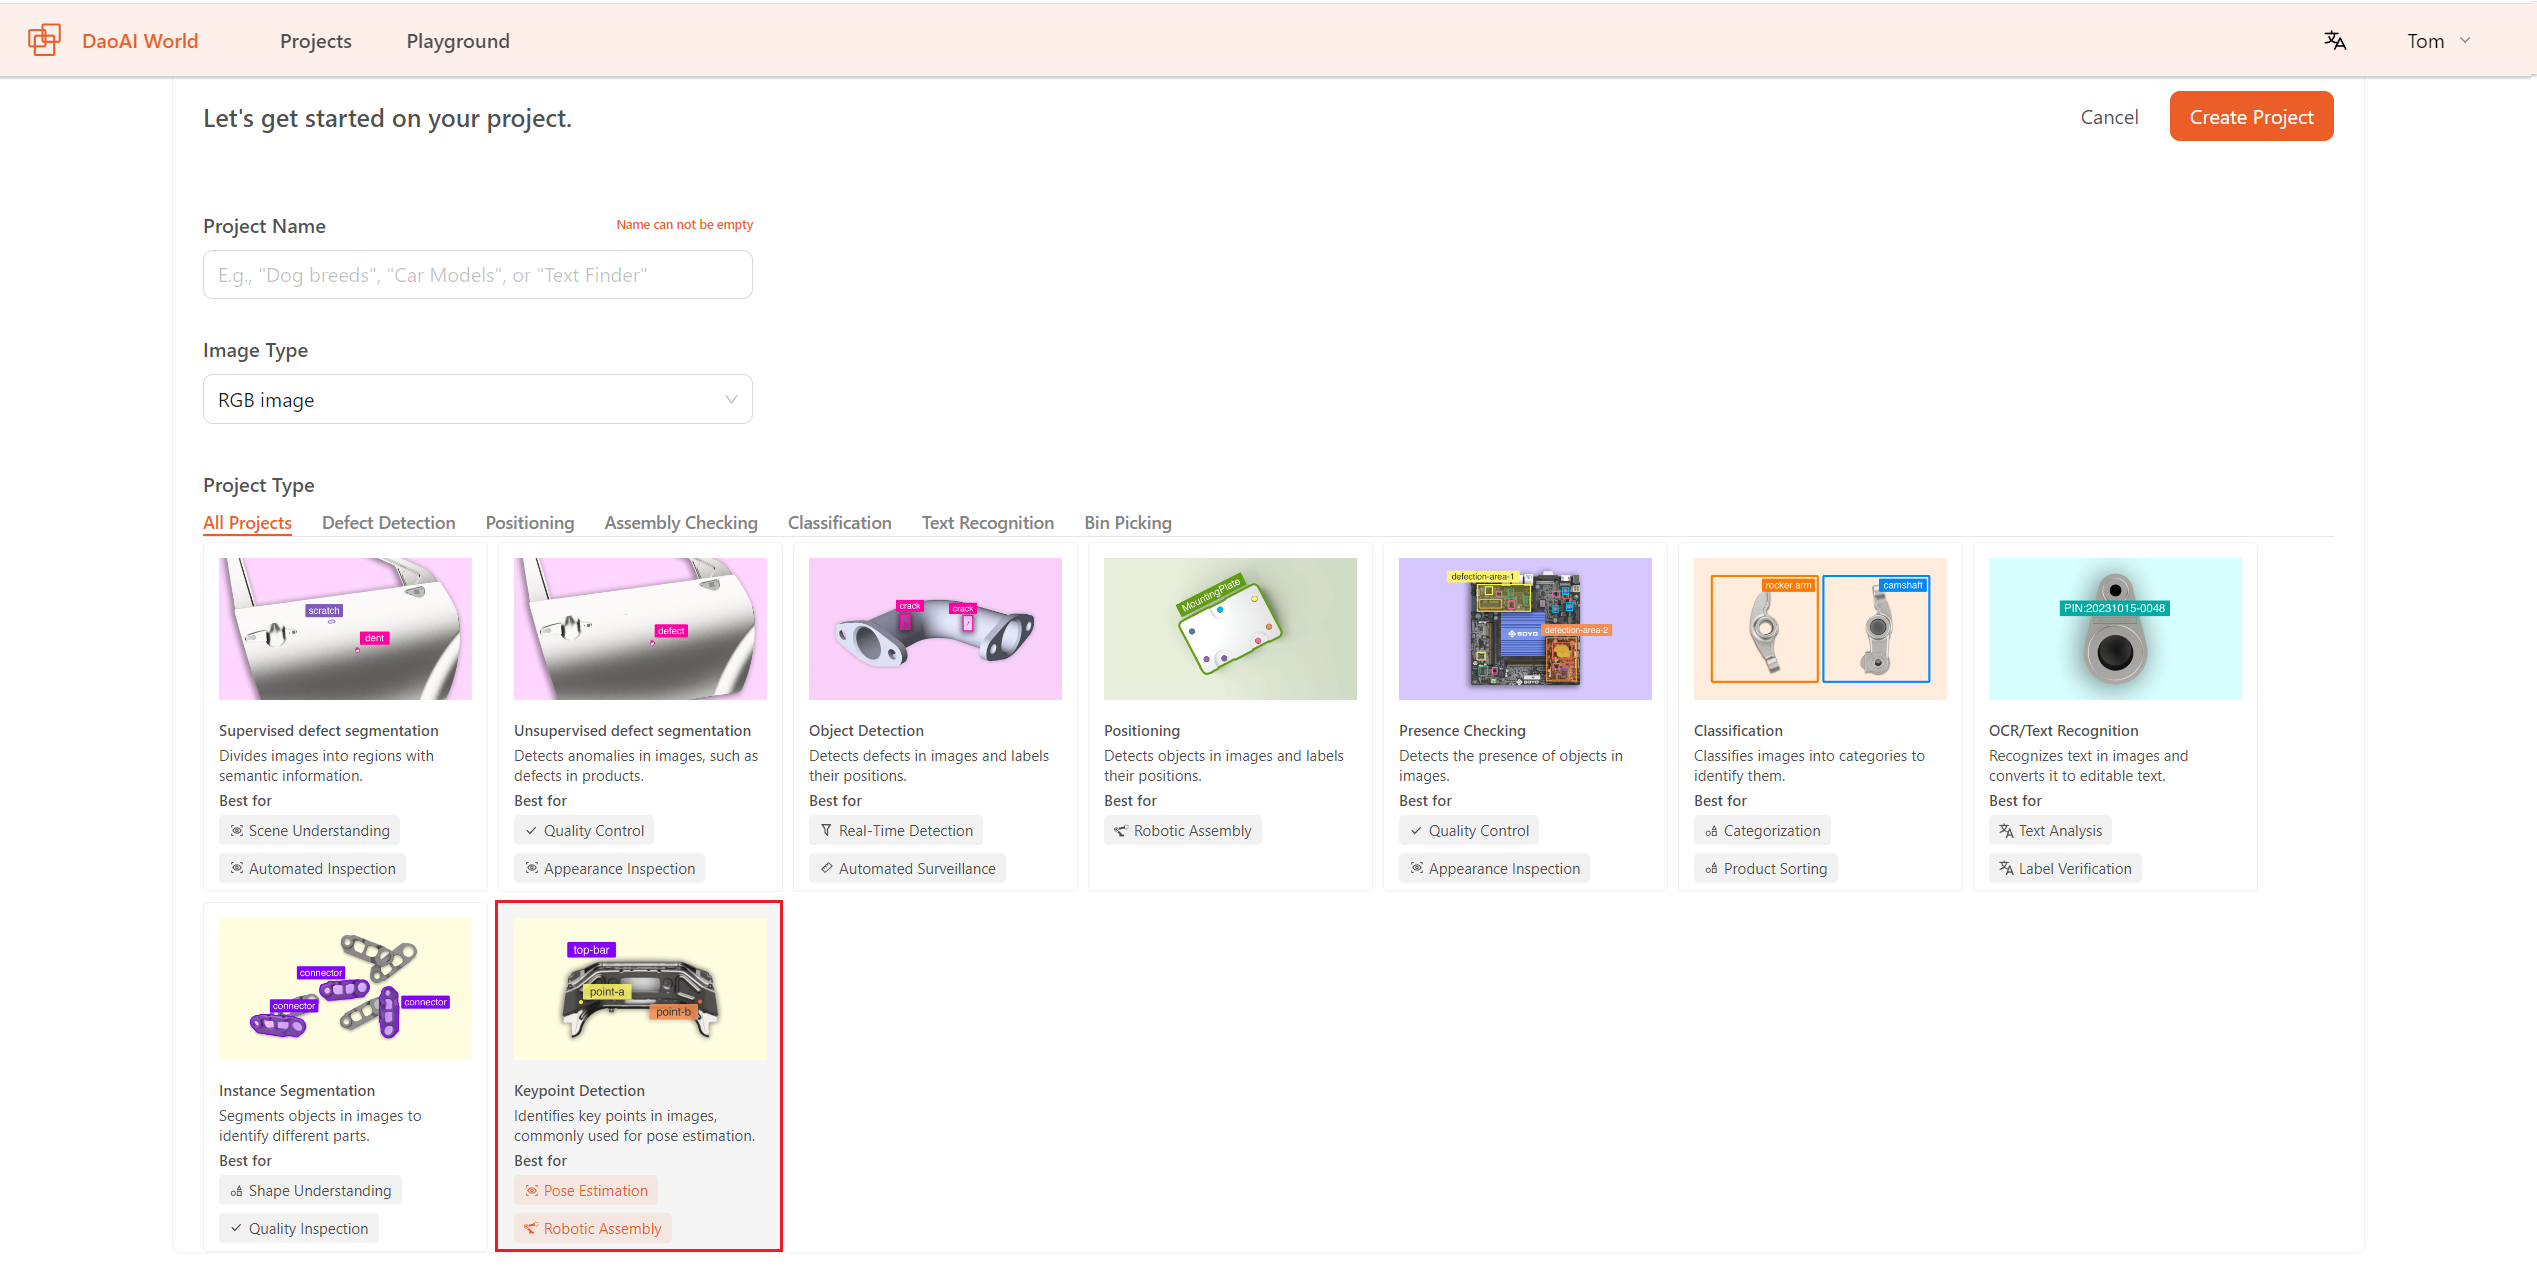
Under Project Type , select the type of project you want to create. In this example, we will choose Keypoint Detection , add a project name, and then click Create Project .
For more detailed information about the features of each model, please refer to the Select a Model section.
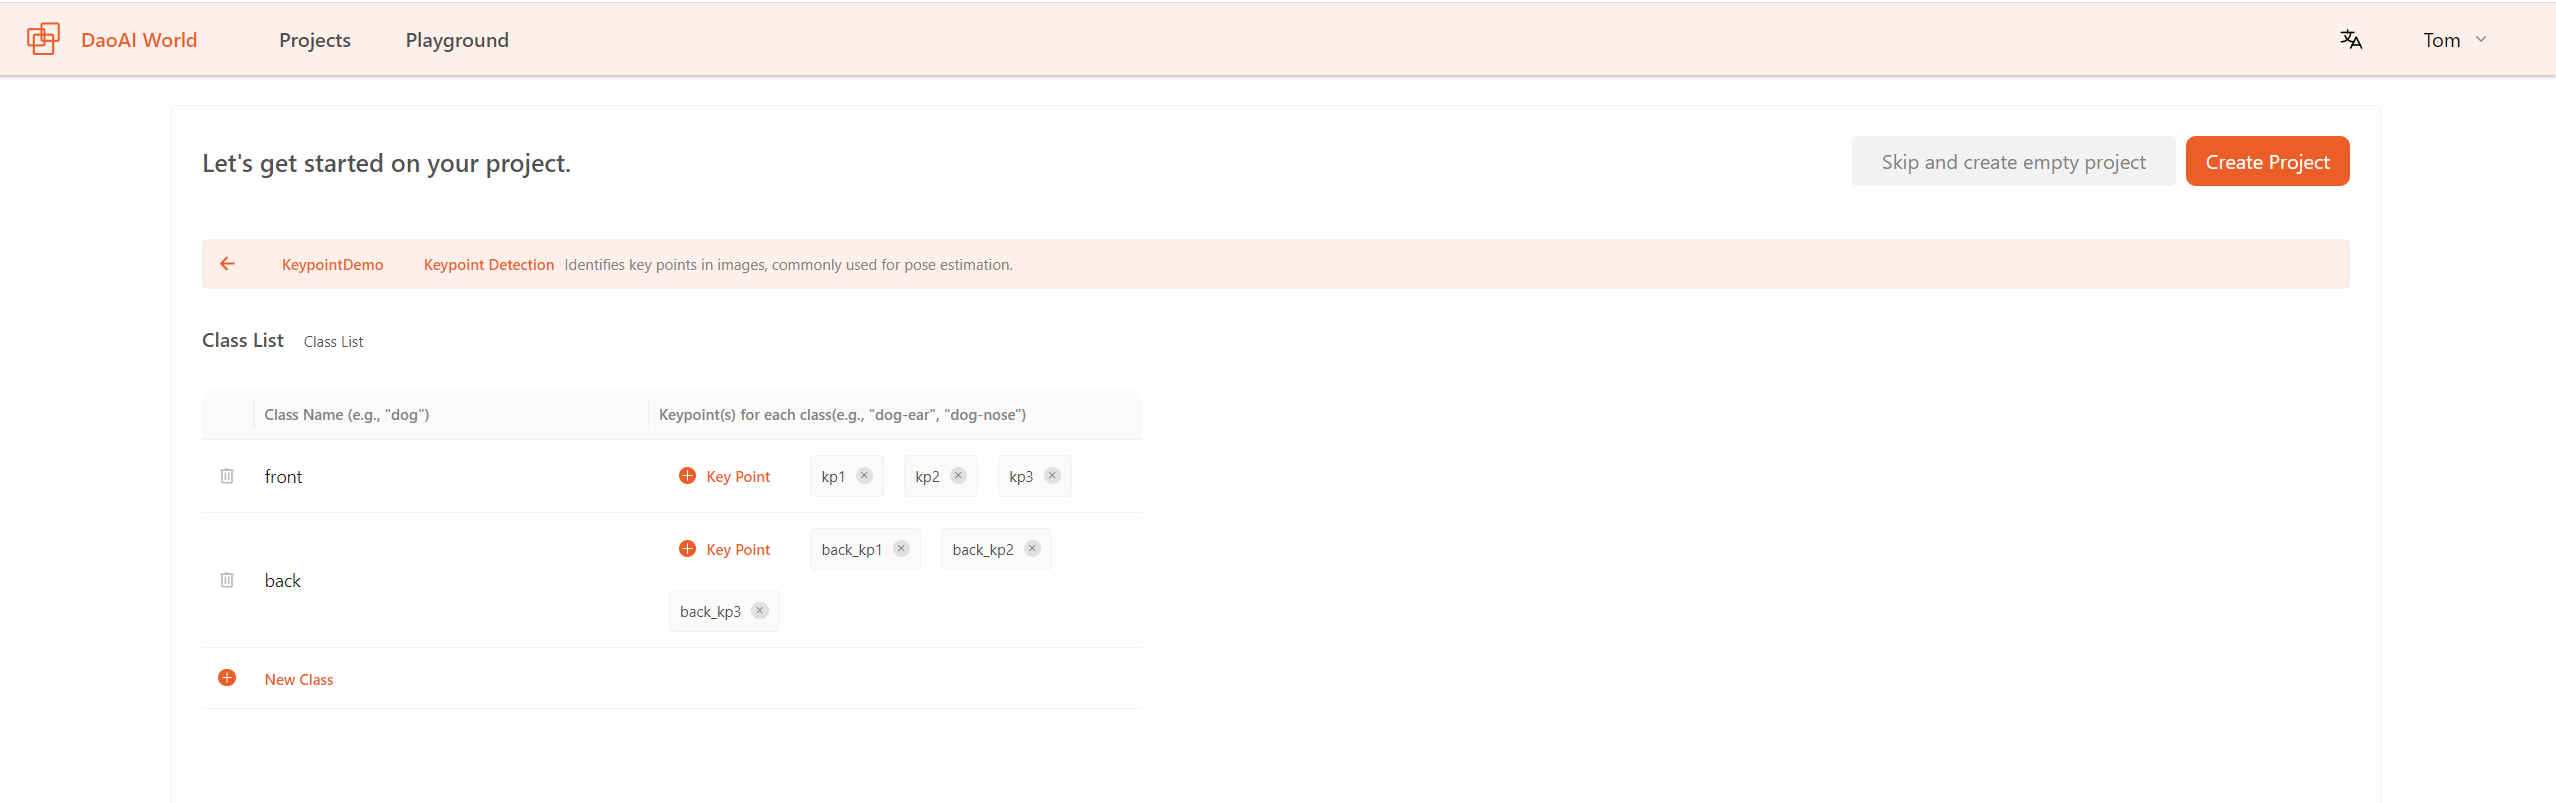
Next, we need to configure the label information for the data. If the data you are going to add are already annotated, you can select Skip and Create Empty Project ;
If the data is not already annotated, you can add label information here. Once the label information is added, you can click Create Project to proceed.
Demo Project
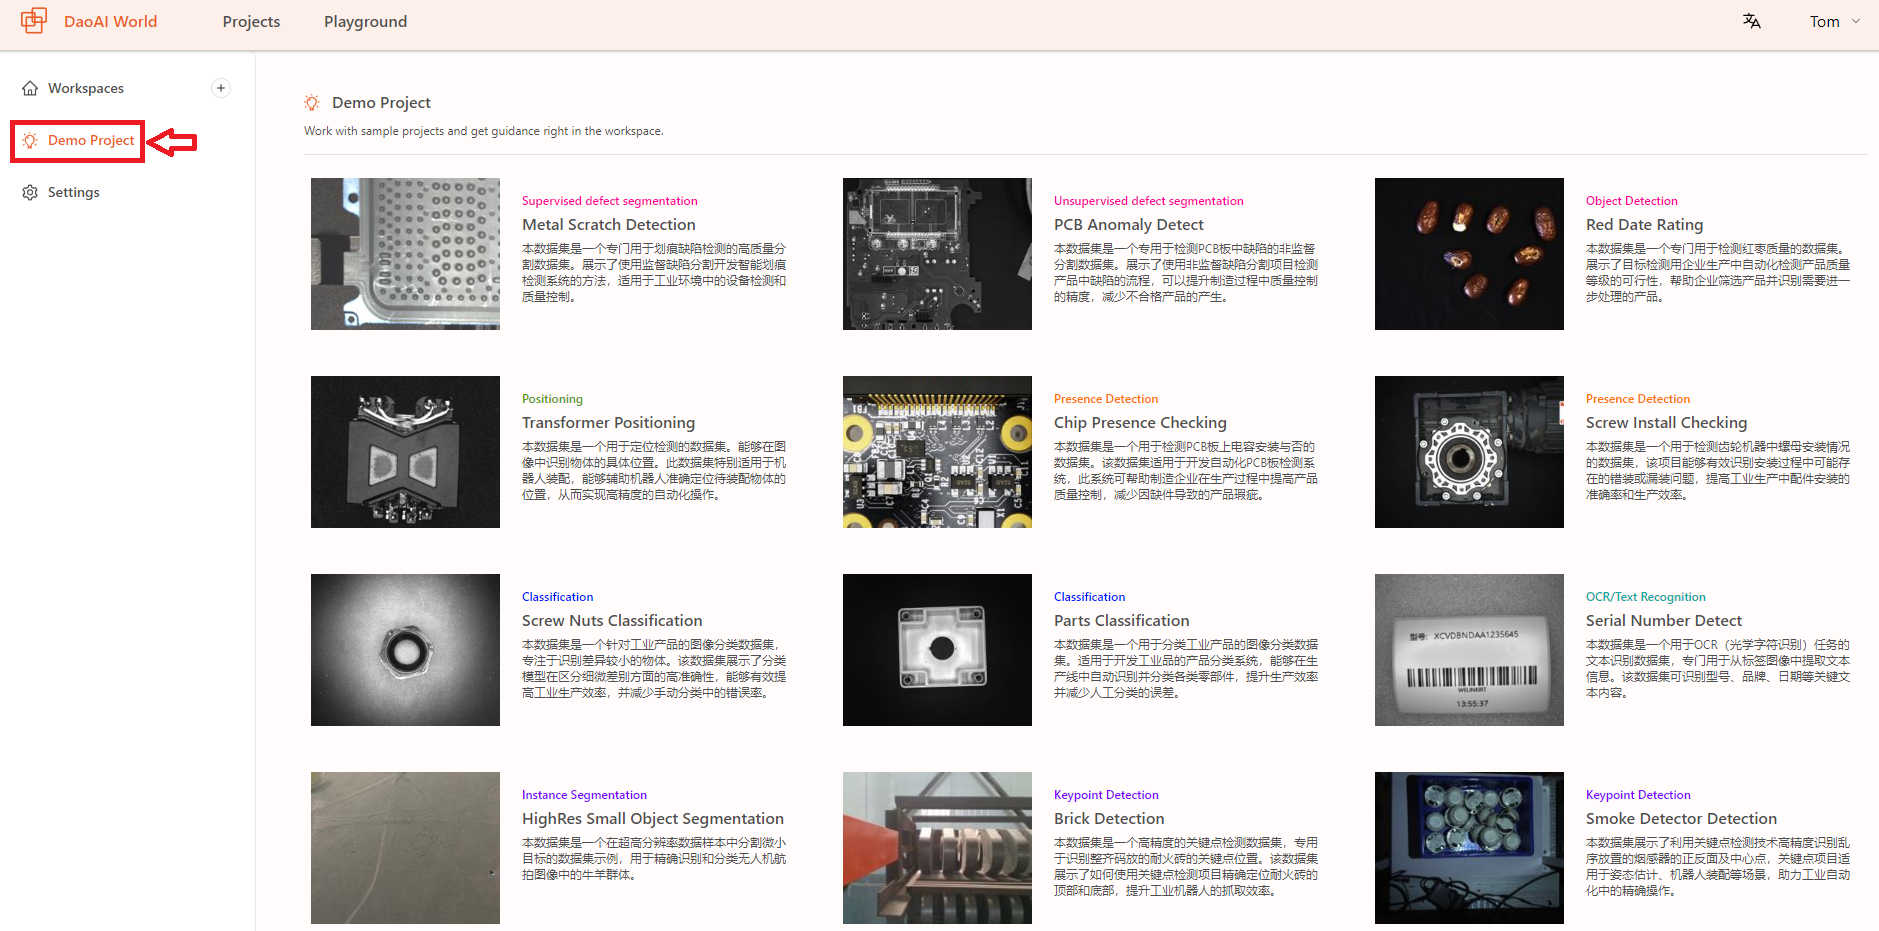
DaoAI World can use demo project's data as guidance or for copying into your own projects for practice.
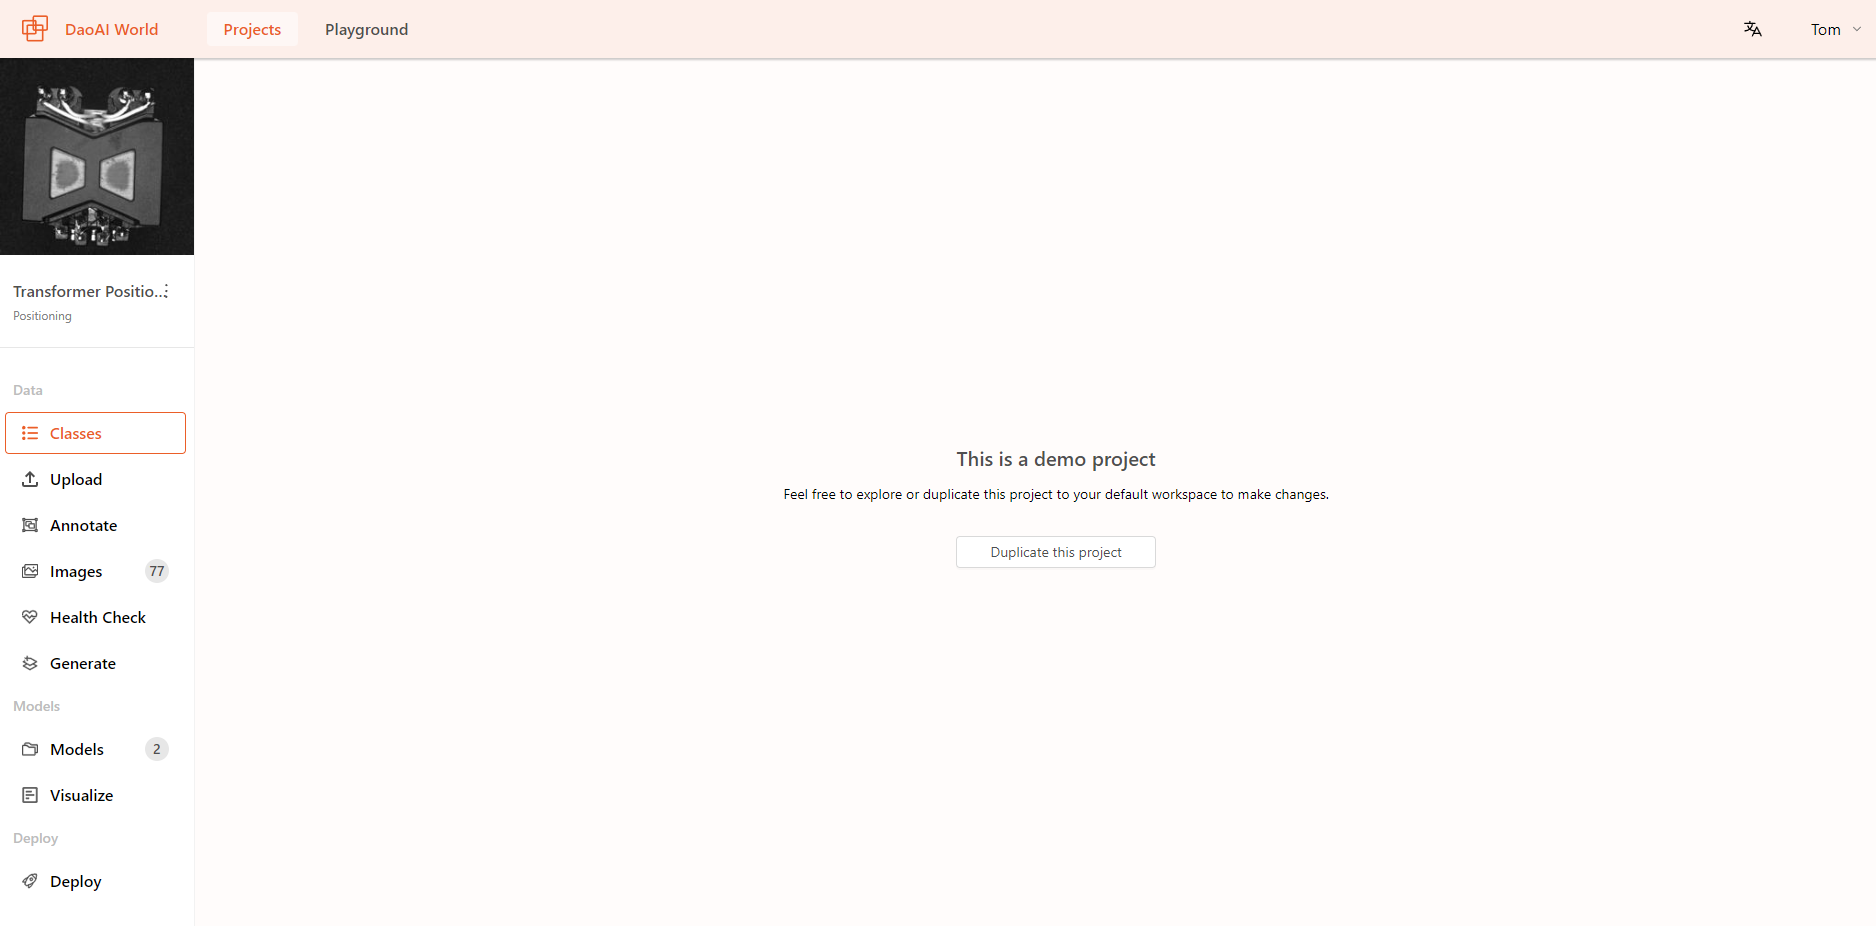
Click on the project you wish to select, you will see an introduction to the project. You can then duplicate this project it to your own workspace for use.
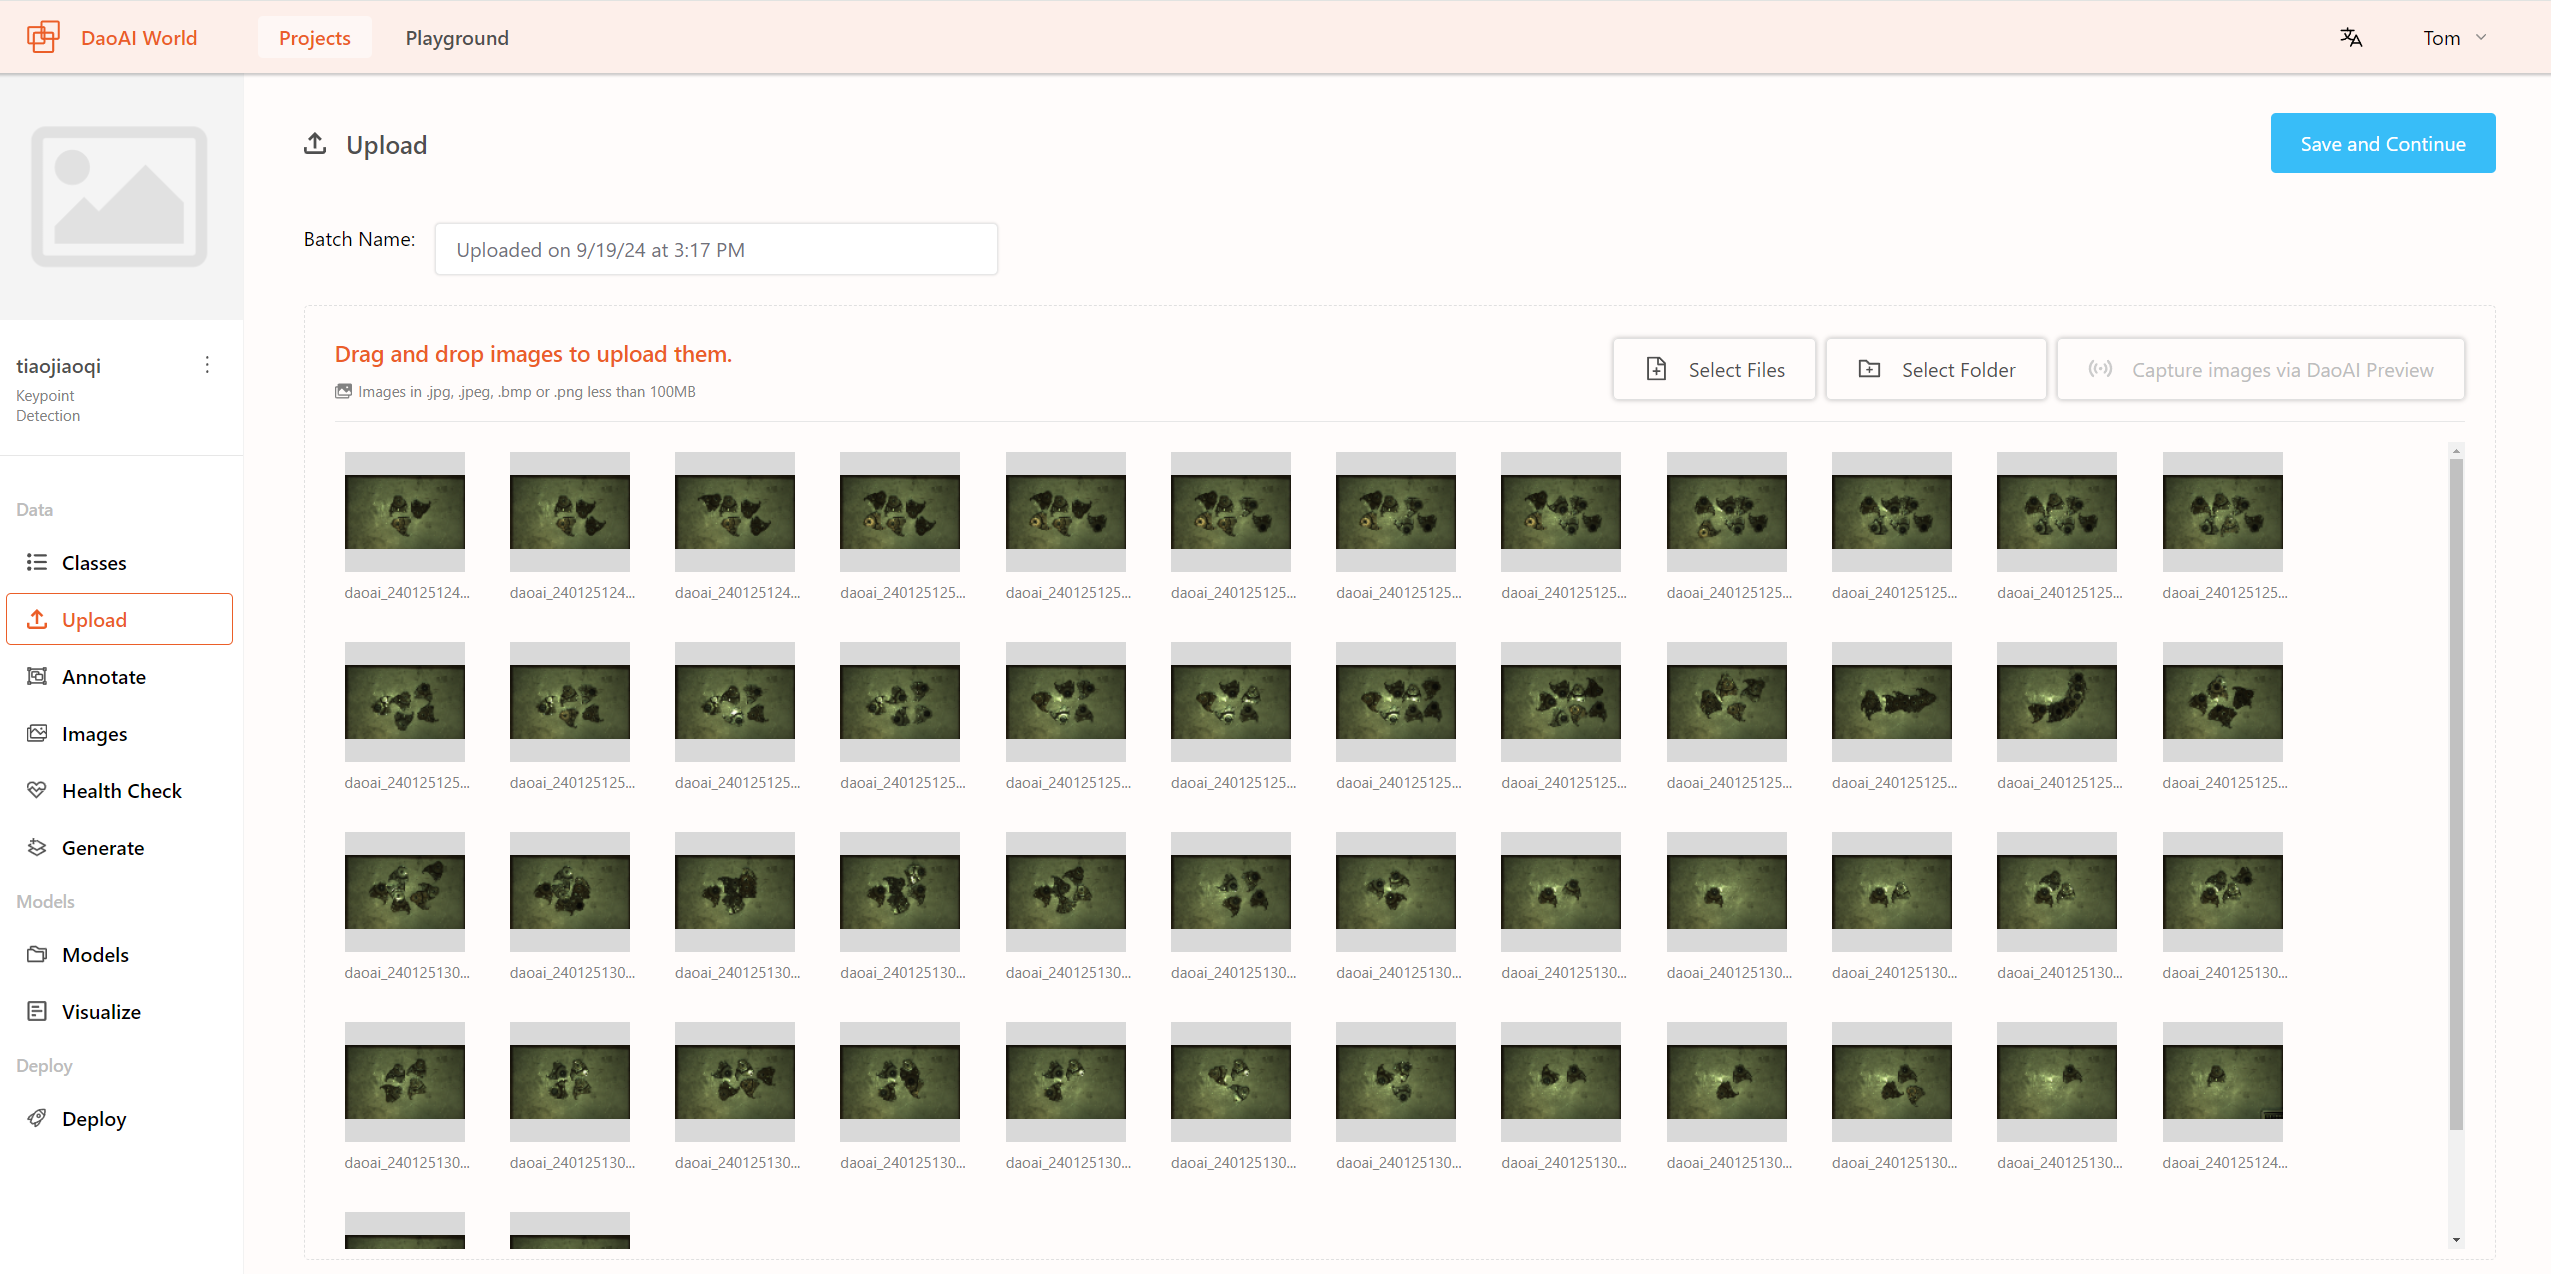
Upload Data
DaoAI World supports uploading single images (png, jpg, jpeg, bmp) or uploading all images from a folder. You can also upload annotated data files (.json) together with the images, or directly import data from other pre-existing projects.
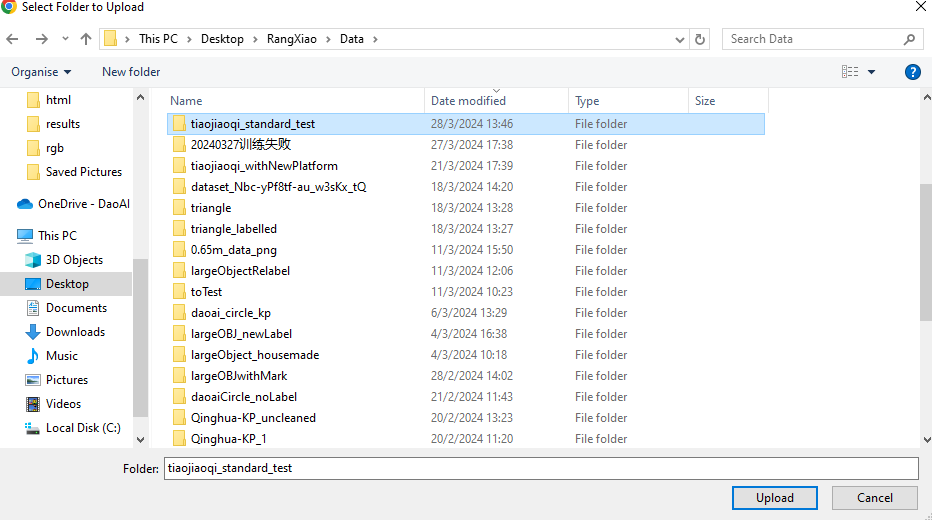
Here, we will click on Select Folder to upload our dataset in bulk.
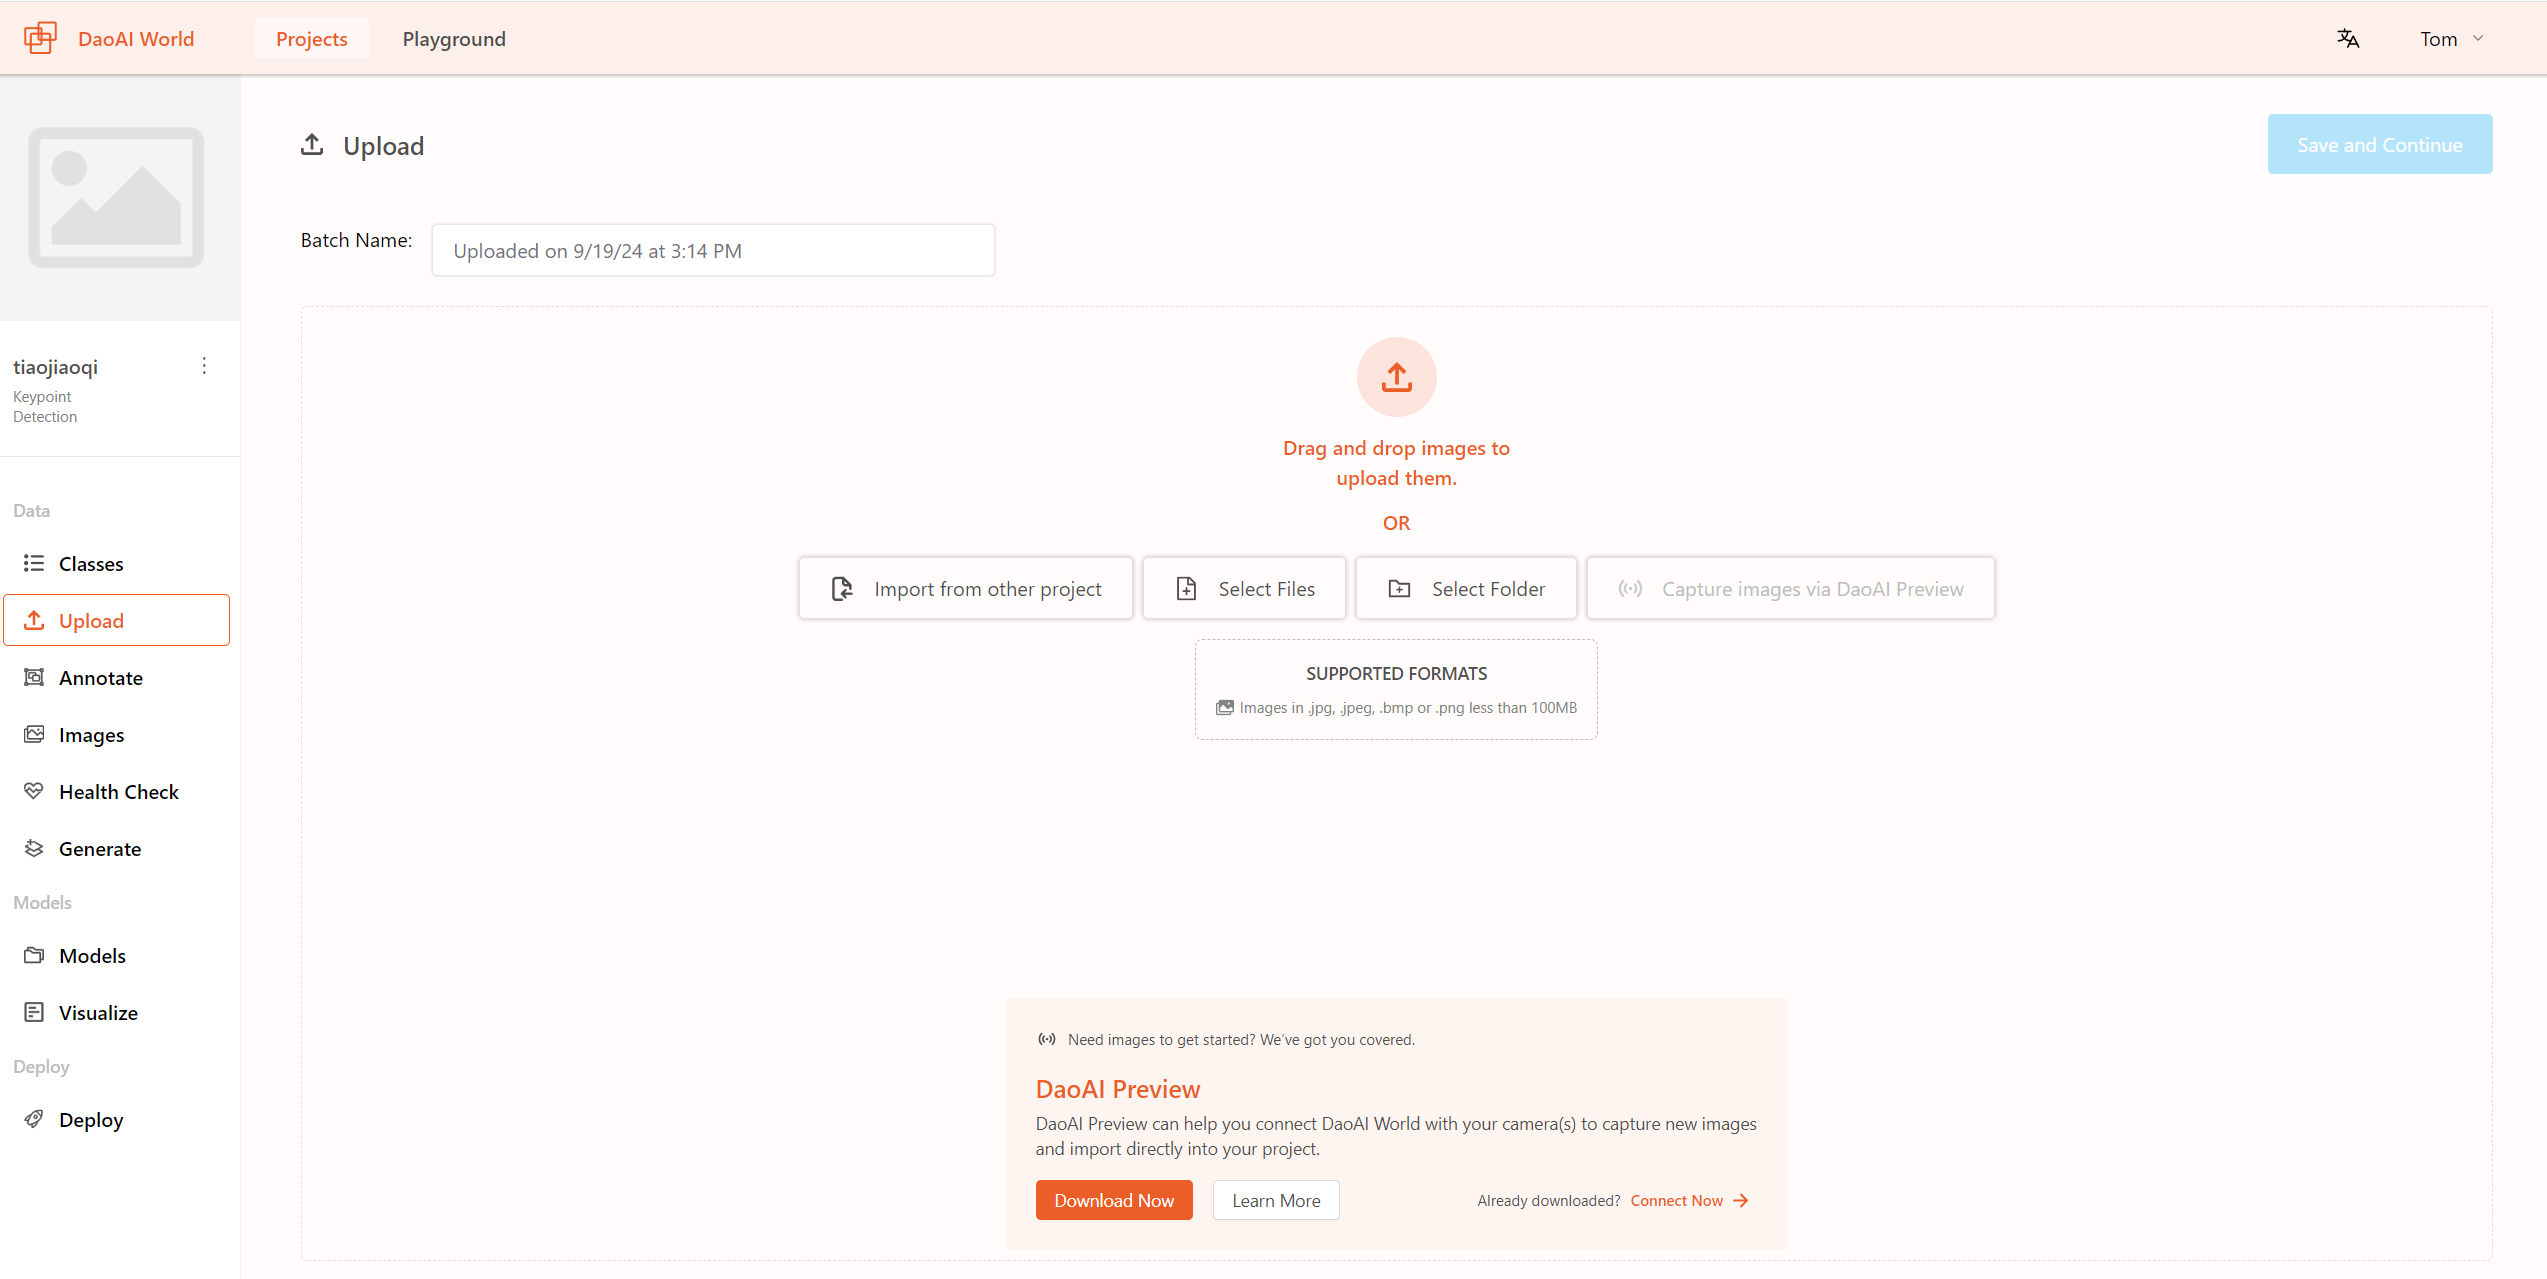
In the pop-up file selection window, choose your dataset folder and click on Select Folder . Wait for the data to finish uploading.
Then, you will see all your images displayed in the window. You can modify the dataset name or delete individual images if needed, but we won't demonstrate that here.
If everything looks correct, you can click Save and Continue to upload the data to the project and proceed to annotation.
Data Annotation
Polygon Annotation
The image below shows an unannotated picture from the protractor dataset. You will use the polygon tool to outline the protractor's outer contour.
The information you annotate serves as the ground truth answer the computer vision model will learn from. The more images we have and the more annotations we create,
the more information the model will have to learn the characteristics of each class.Follow the polygon tool instructions to annotate the unmarked protractor in the image below.

Use the Smart Polygon Tool to mark the object's outer contour.
Select the Smart Polygon Tool , then move the cursor over the object you want to label.
Observe the tool's suggested boundary around the object. If you're satisfied with the current boundary, click the left mouse button to confirm the polygon outline.
You can also use the right mouse button to select the parts where you want to exclude from the boundary.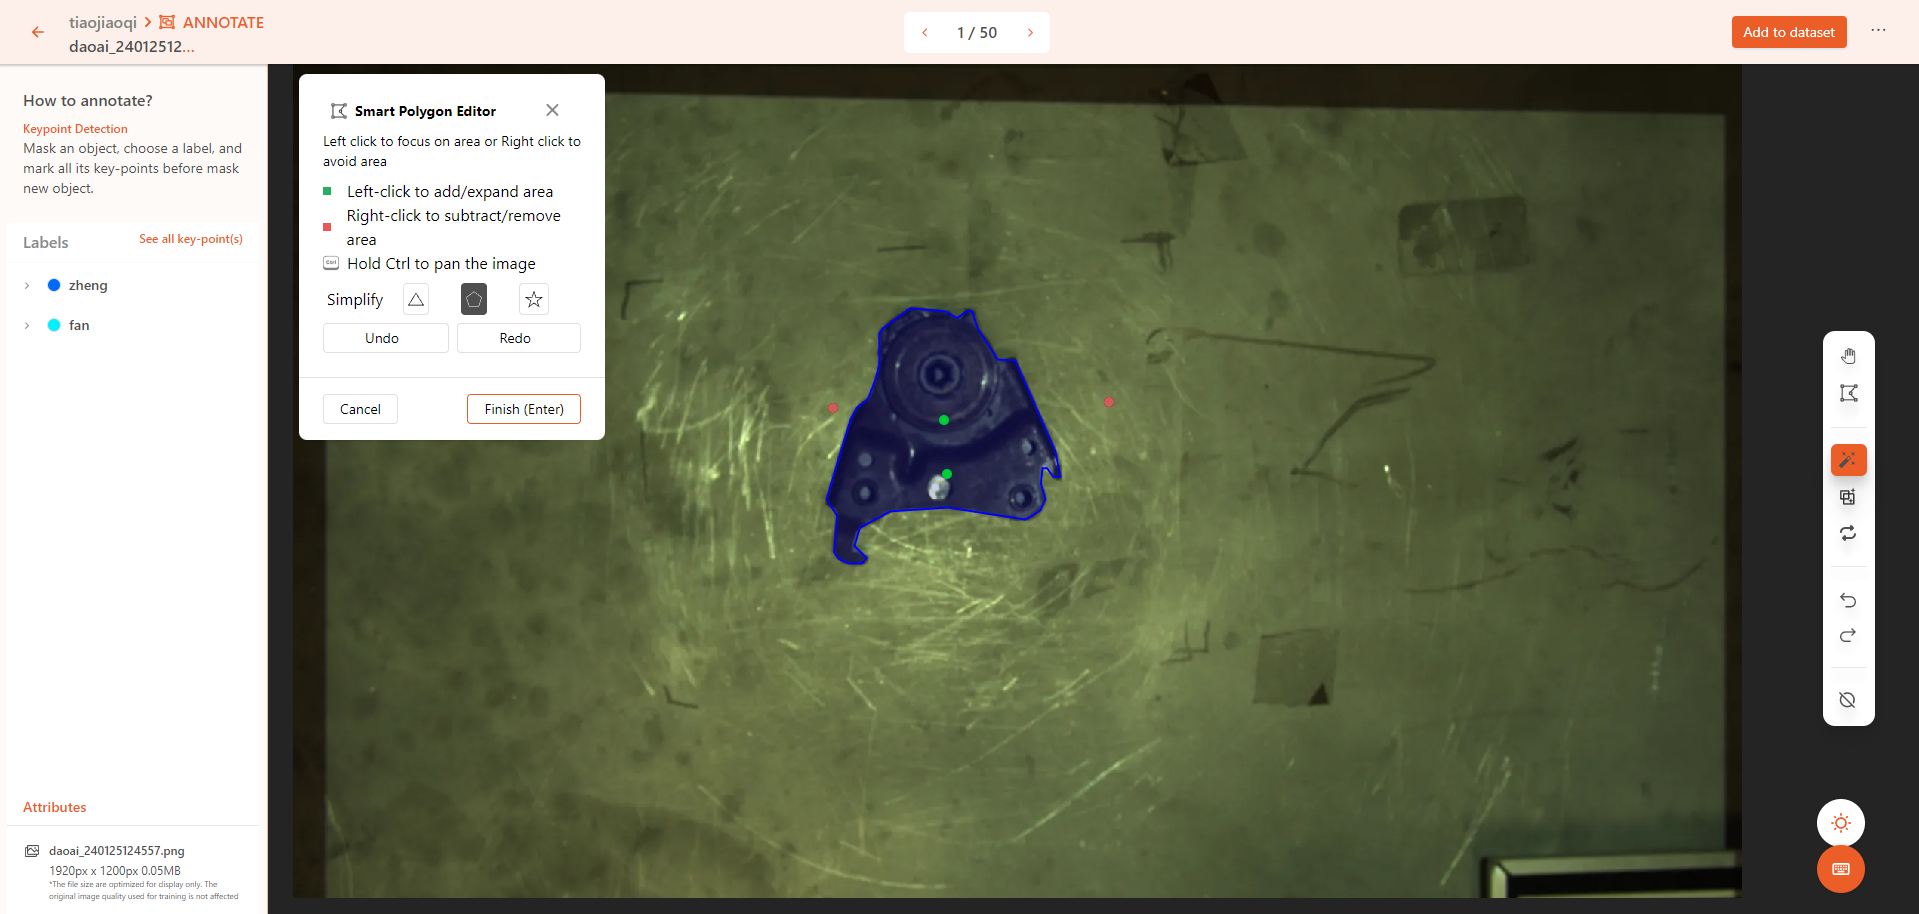
We have just added an "mask" annotation to the image. This indicates that we have outlined the object of interest.
Adding an outer contour is a common technique in computer vision, frequently used for segmentation tasks.
The polygon tool helps you accurately trace the precise outline of the object of interest.Keypoint Annotation
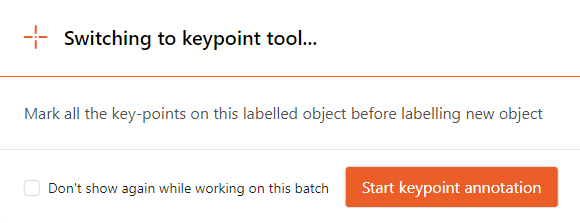
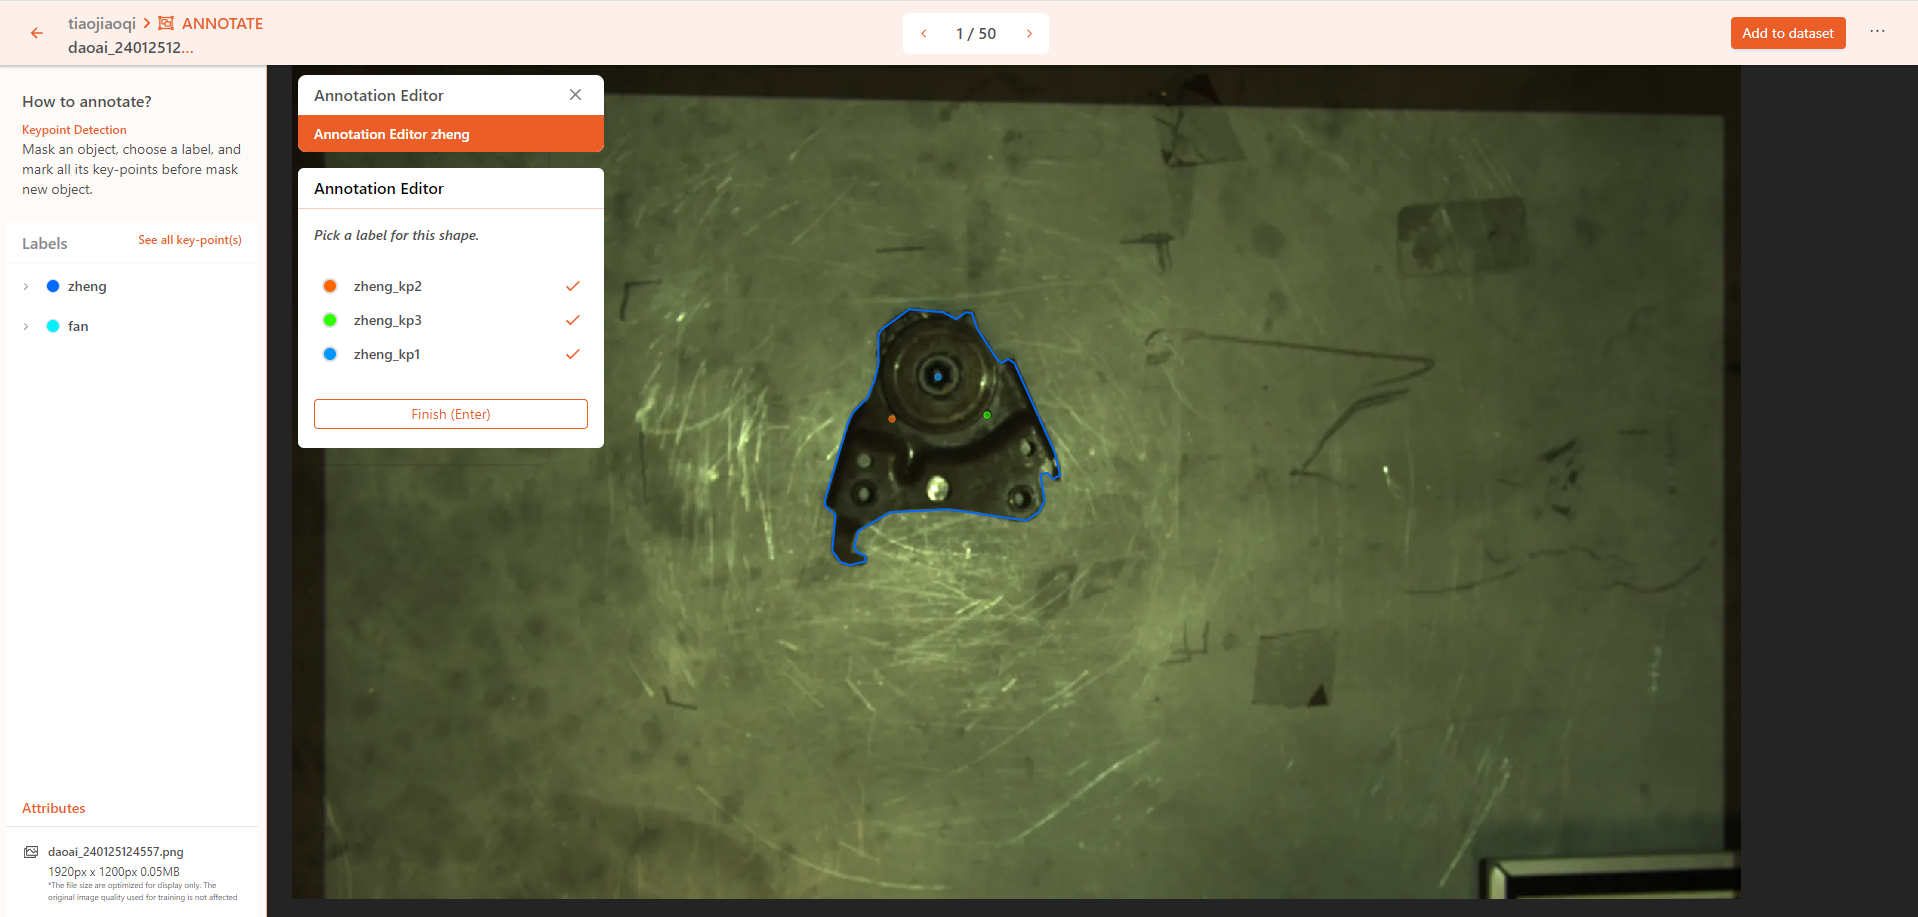
Since our current project type is keypoint annotations, in addition to annotating the object's mask, we also need to add keypoint data.
This will enable the computer vision model to recognize the precise position and rotation information, making it easier for robots to perform high precision tasks such as grasping or other operations.Once we have completed the outer contour annotation of an object, the system will prompt us to annotate the keypoints for the current object. Click Start Keypoint Annotation to begin annotating the keypoints.
Click on the location of the keypoint on the object, then select the corresponding keypoint name from the list on the right. Click Save or press
Enterto complete the annotation of a keypoint.
Repeat the above steps until all keypoints for the current object are annotated. Once all keypoints are annotated, click Complete to Finish annotating the entire object.
Add Annotated Data to Dataset
Once you have annotated all your images, you need to add the annotated data to your dataset for model training.
Go to the annotation interface and click on Add Annotated Images to Dataset in the top right corner to add your annotated data to the dataset for training.
- Create Dataset Version
After completing the annotations and adding the annotated images to the dataset, click Generate to generate a new version of the dataset (you can think of it as version control for the data).
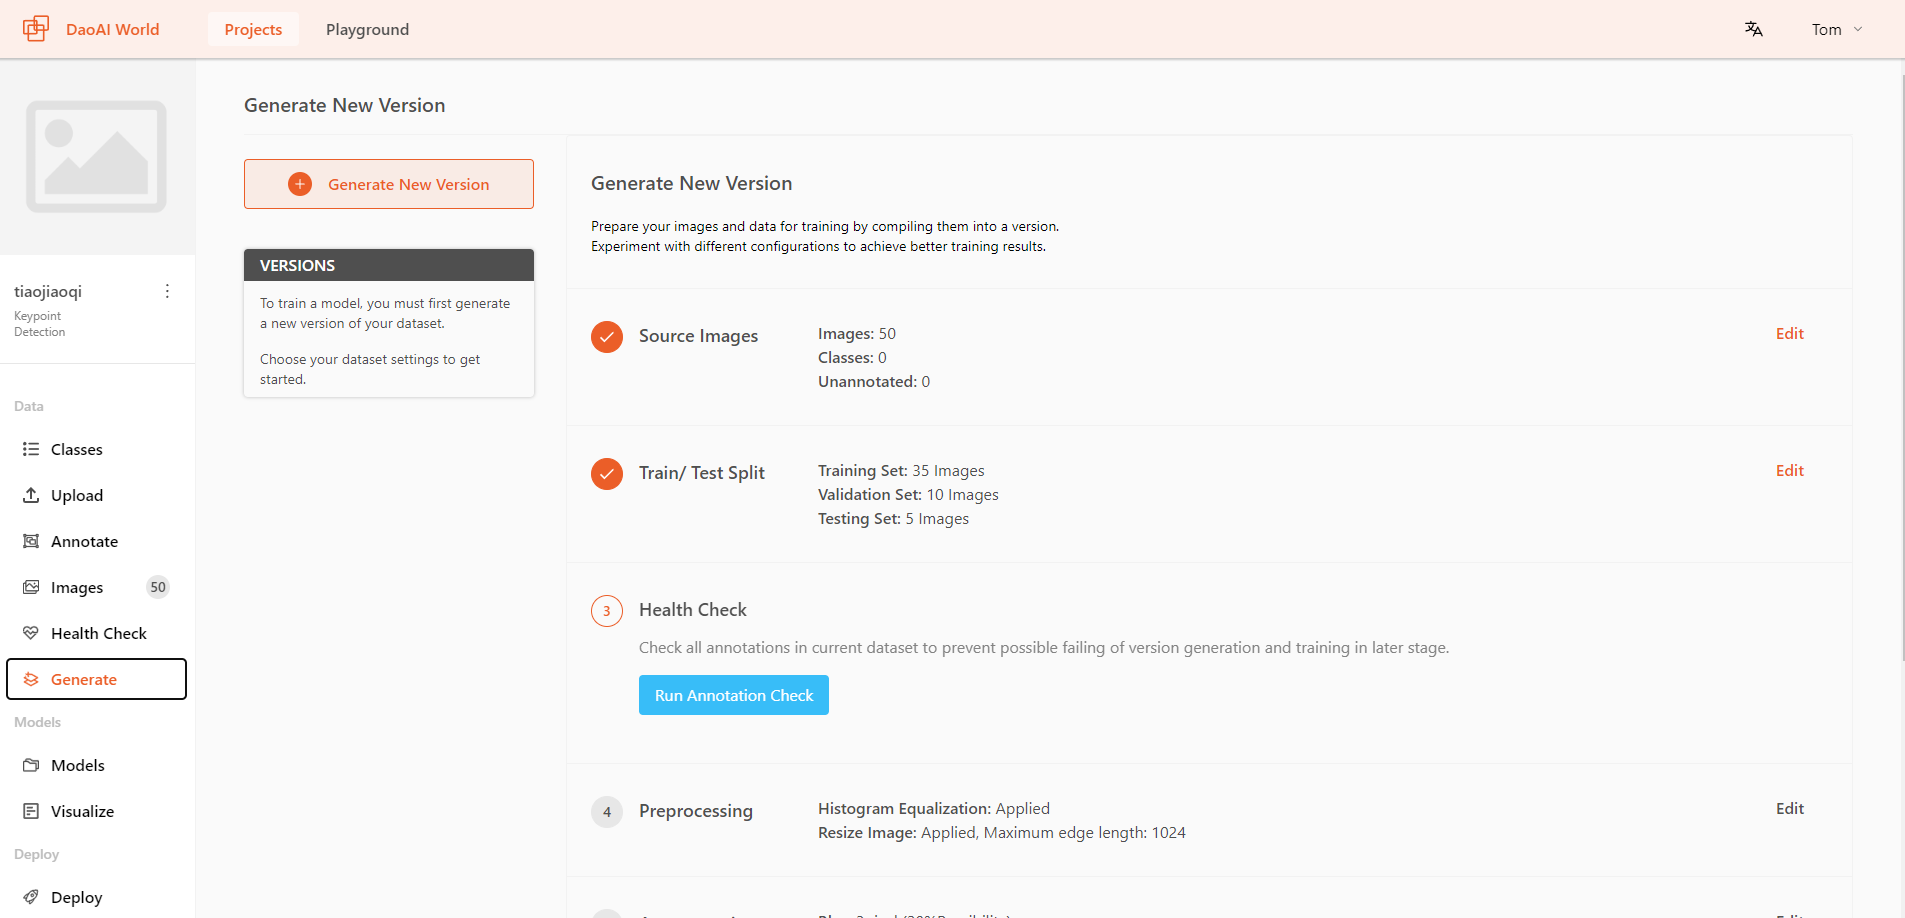
Before creating the training dataset, we need to use the built-in dataset health check tool to confirm whether there are any annotation issues in the dataset that might cause training failures.
Click Run Health Check and wait for the dataset report to be generated.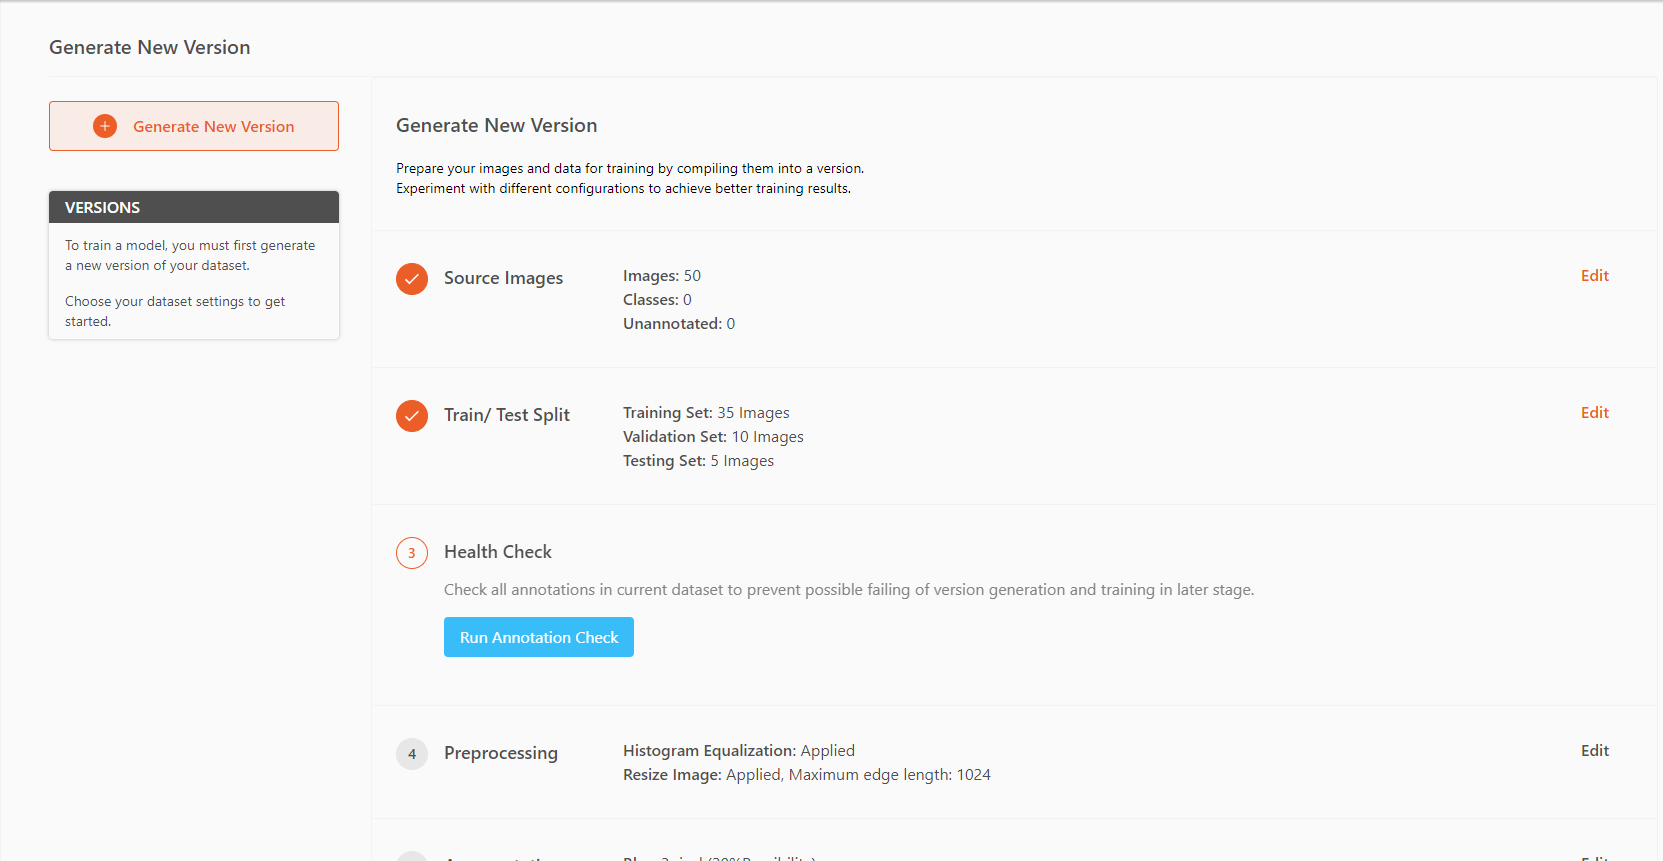
You can also choose functions such as preprocessing and data augmentation.
For convenience, preprocessing and data augmentation have not been added here (it’s important to note that more preprocessing and data augmentation do not necessarily lead to better model; only the appropriate methods are beneficial).After making your choices, click Create to complete the creation of a dataset version.
DaoAI World provides default preprocessing methods for some training models, as shown in the image below:
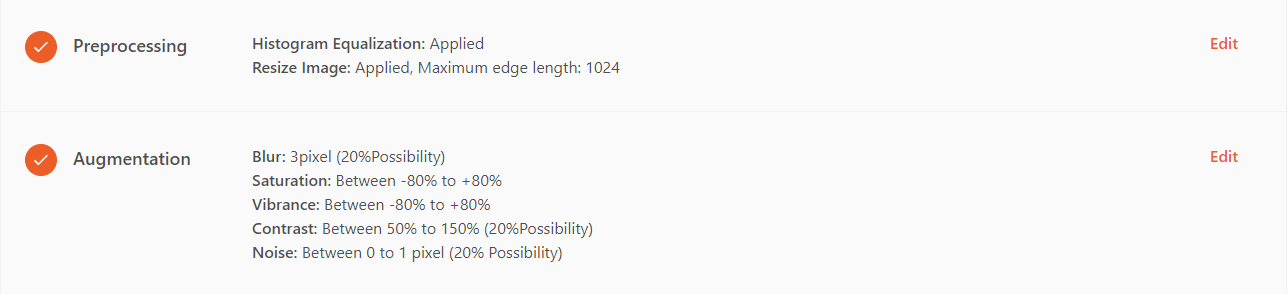
For more information on preprocessing and data augmentation methods and their effects, please refer to Dataset Management .
Training
After completing the above steps, we arrive at the final step: the training phase.
DaoAI World offers various training modes to meet different model application needs.
For keypoint detection projects, DaoAI World provides three training modes: Fast , Accurate , and Rotation Accurate .
You can choose the training mode that best suits your needs.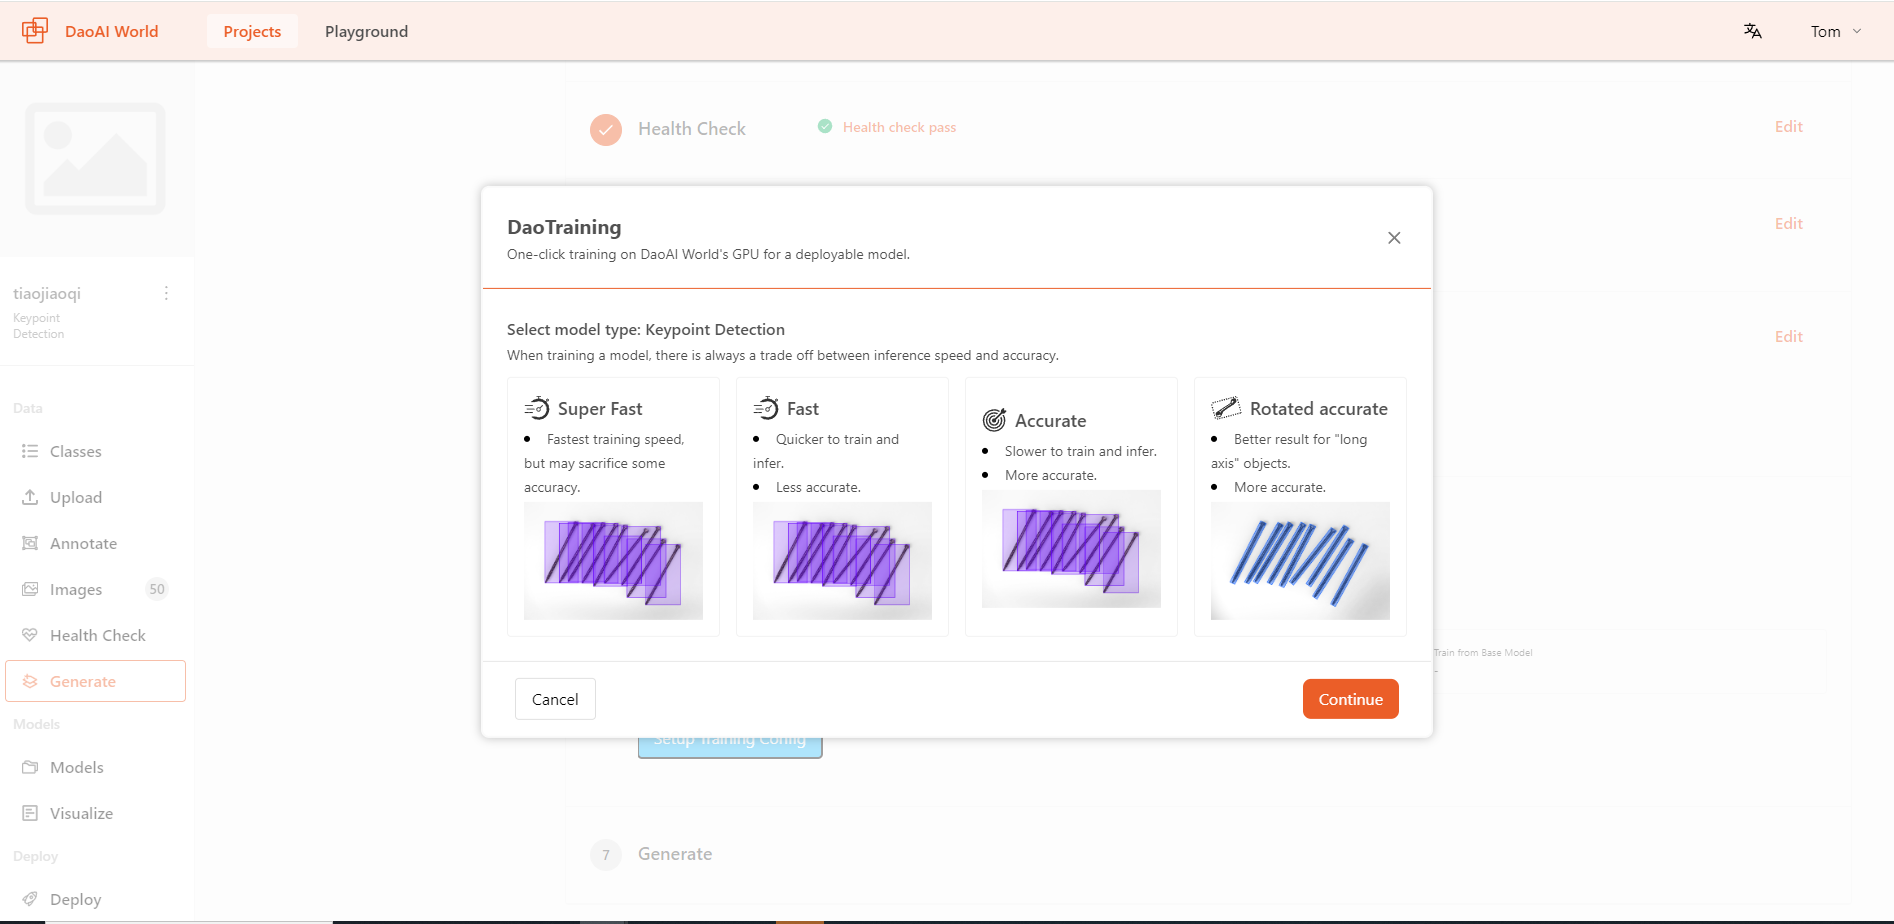
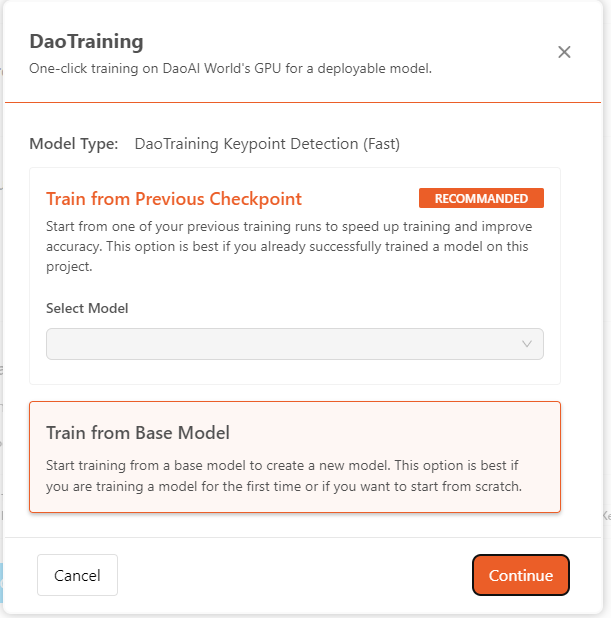
After making your selection, click Continue and Select the label and checkpoint for this training.

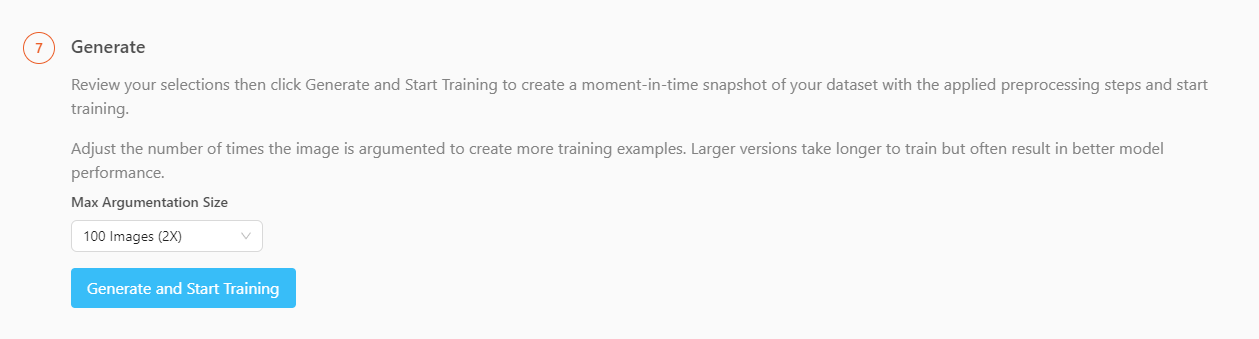
Then select the Max Augmentation Size , then click Generate and Start Training to start training.
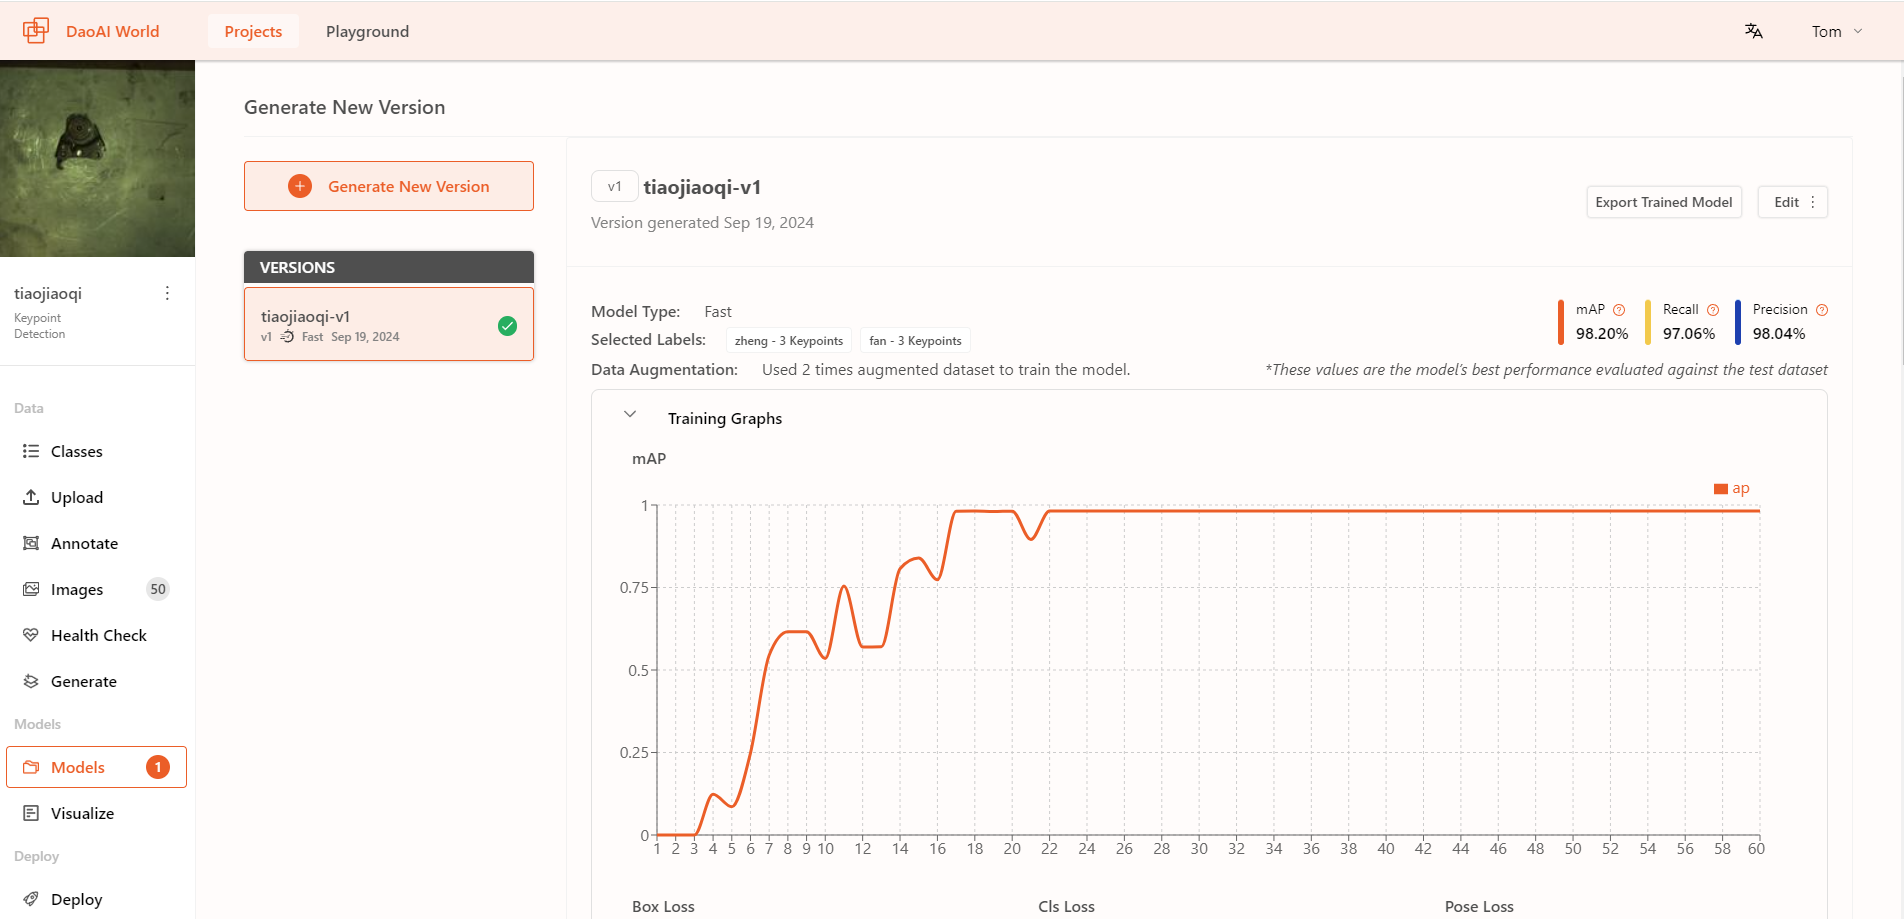
Once training starts, you can view the real-time model training progress. The required training time will also be displayed above the chart.
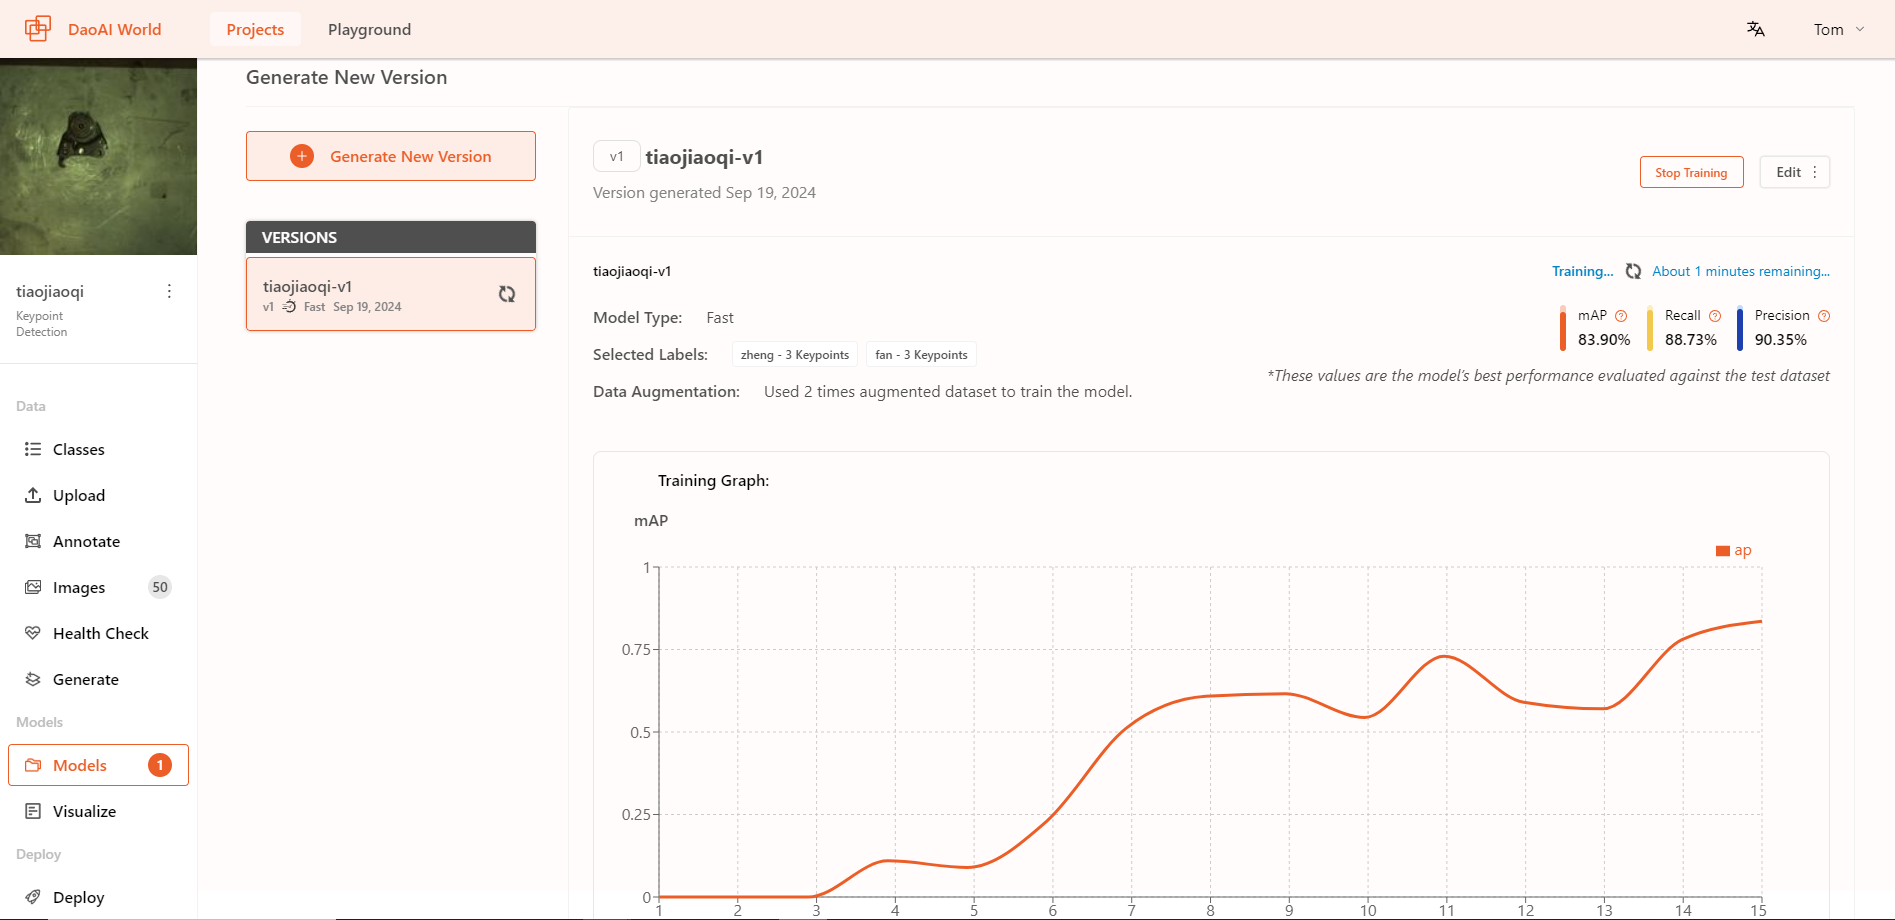
During the model training process in DaoAI World, you can monitor the training status by viewing the real-time training charts.
Once DaoAI World has completed the model training, it will look like the image below.You can then choose to export the model. The exported model can be used with DaoAI Vision Pilot , DaoAI InspecTRA , or the DaoAI World SDK.
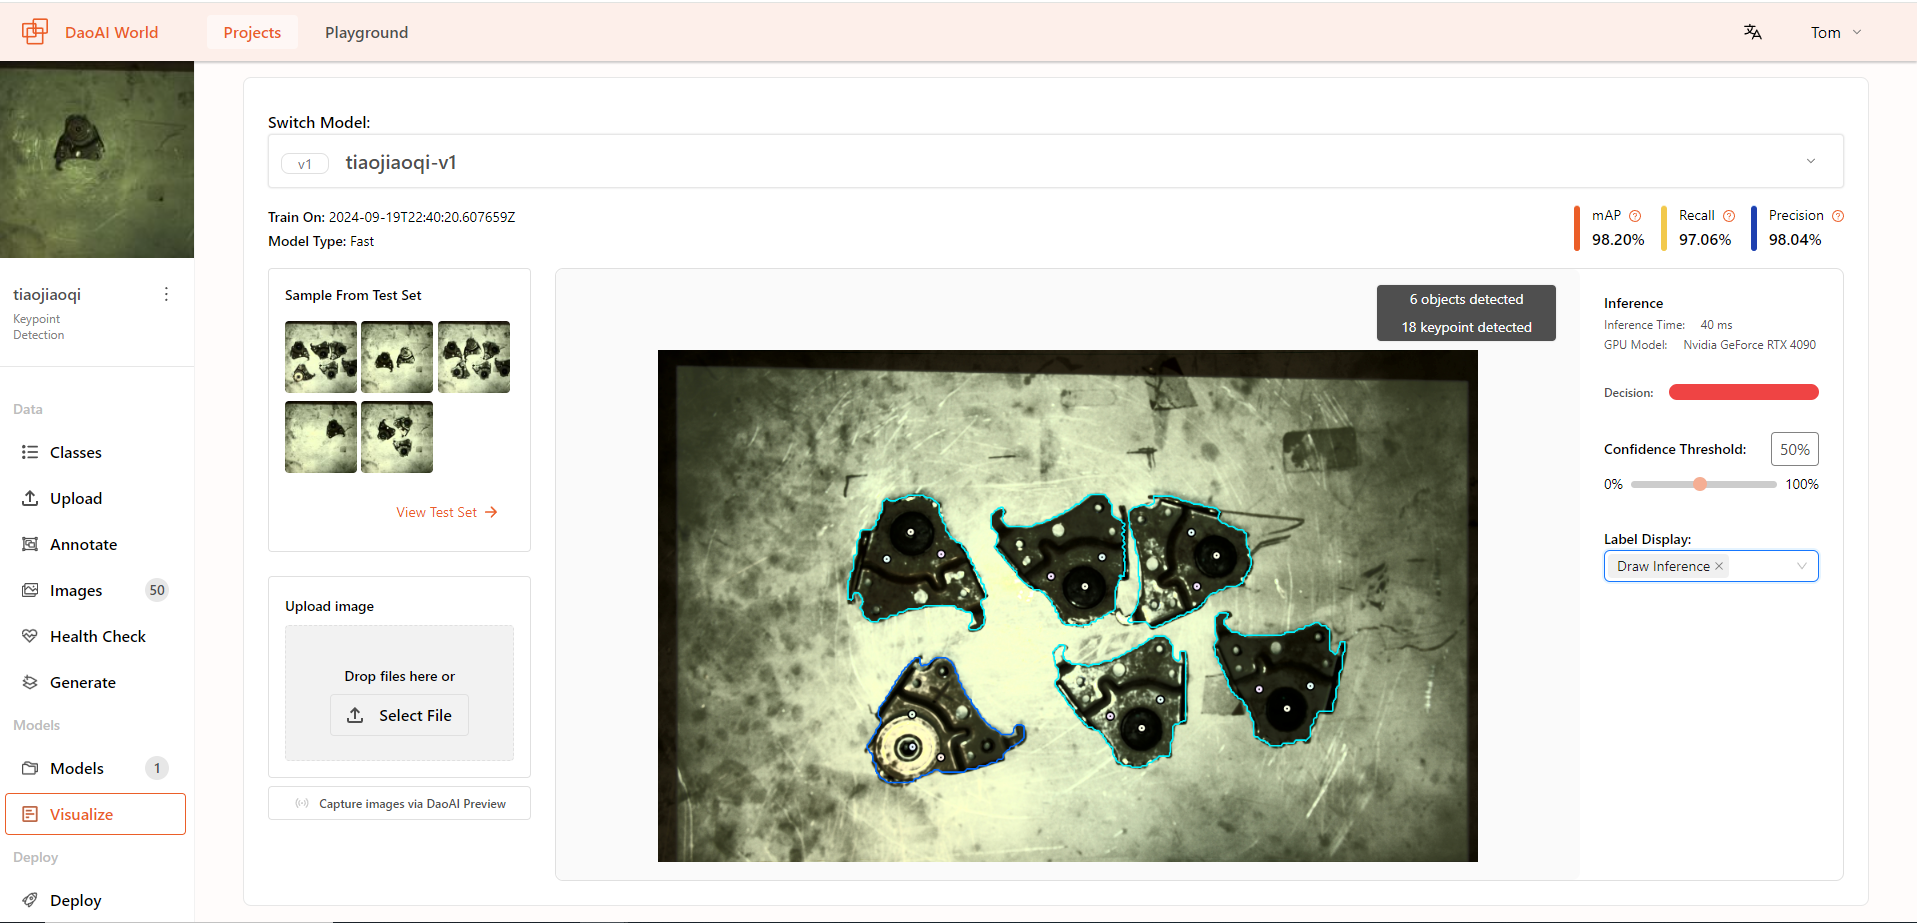
You can also click on Visualize in the left navigation bar to manually check the model's result accuracy. Or inspect the Model's performace on the dataset.